
The base mannequin M4 Mac mini is among the greatest values in Mac computer systems, however upgrading the storage to the utmost 2TB considerably reduces that worth proposition. That’s as a result of Apple costs an insane $800 for the improve, turning the price range $600 laptop to a $1400 one. In different phrases, you should purchase two base mannequin Mac minis for lower than the worth of a single Mac mini with a 2TB improve.
However fret not, as a result of Broaden Mac mini presents a 2TB improve for the M4 Mac mini for simply $320 – lower than half of what Apple costs. On this hands-on step-by-step video walkthrough, I present you improve the M4 Mac mini SSD with 2TB of storage. Watch my full video, and remember to subscribe to 9to5Mac on YouTube for extra Mac guides and tutorials.
Disclaimer: This solely works with the Mac mini with M4 chip. It doesn’t work with the higher-end M4 Professional Mac mini.
Belongings you’ll want:
- Base M4 Mac mini
- Broaden Mac mini 2TB SSD
- A second Mac working macOS Sonoma 14 or later for restoring macOS
- Exterior SSD for Time Machine backup and restore
- A USB-C to USB-C cable that helps information and charging, not a Thunderbolt cable
- T3, T5, and T8 Torx drivers
- Jimmy software
- Opening Choose
- Tweezer (Non-compulsory)
- Spudger (Non-compulsory)
Broaden Mac mini features a multi-bit screw driver, the mandatory bits, and pryer software, however I a lot want my iFixit Professional Tech Package, which incorporates increased high quality components. It’s not a requirement, however if you happen to plan on doing any kind of DIY stuff, this equipment is sweet to have.
Video: Improve the M4 Mac mini from 256GB to 2TB
Subscribe to 9to5Mac on YouTube for extra movies
Backup your Mac
Earlier than you do something, remember to again up your Mac’s present SSD utilizing Time Machine. It will allow you to simply restore your machine utilizing Migration Assistant as soon as the brand new SSD is put in and DFU-recovered.
Step 1: Join an exterior SSD with free house. Time Machine backups require their very own quantity, so you’ll be able to create a separate quantity through Disk Utility, or simply use your entire SSD. I like to recommend any method of Samsung SSDs; I take advantage of the Samsung T9.
Step 2: Open Settings → Normal → Time Machine and click on Add Backup Disk.
Step 3: Enter your administrator password.
Step 4: Choose your exterior SSD and select Set Up Disk…
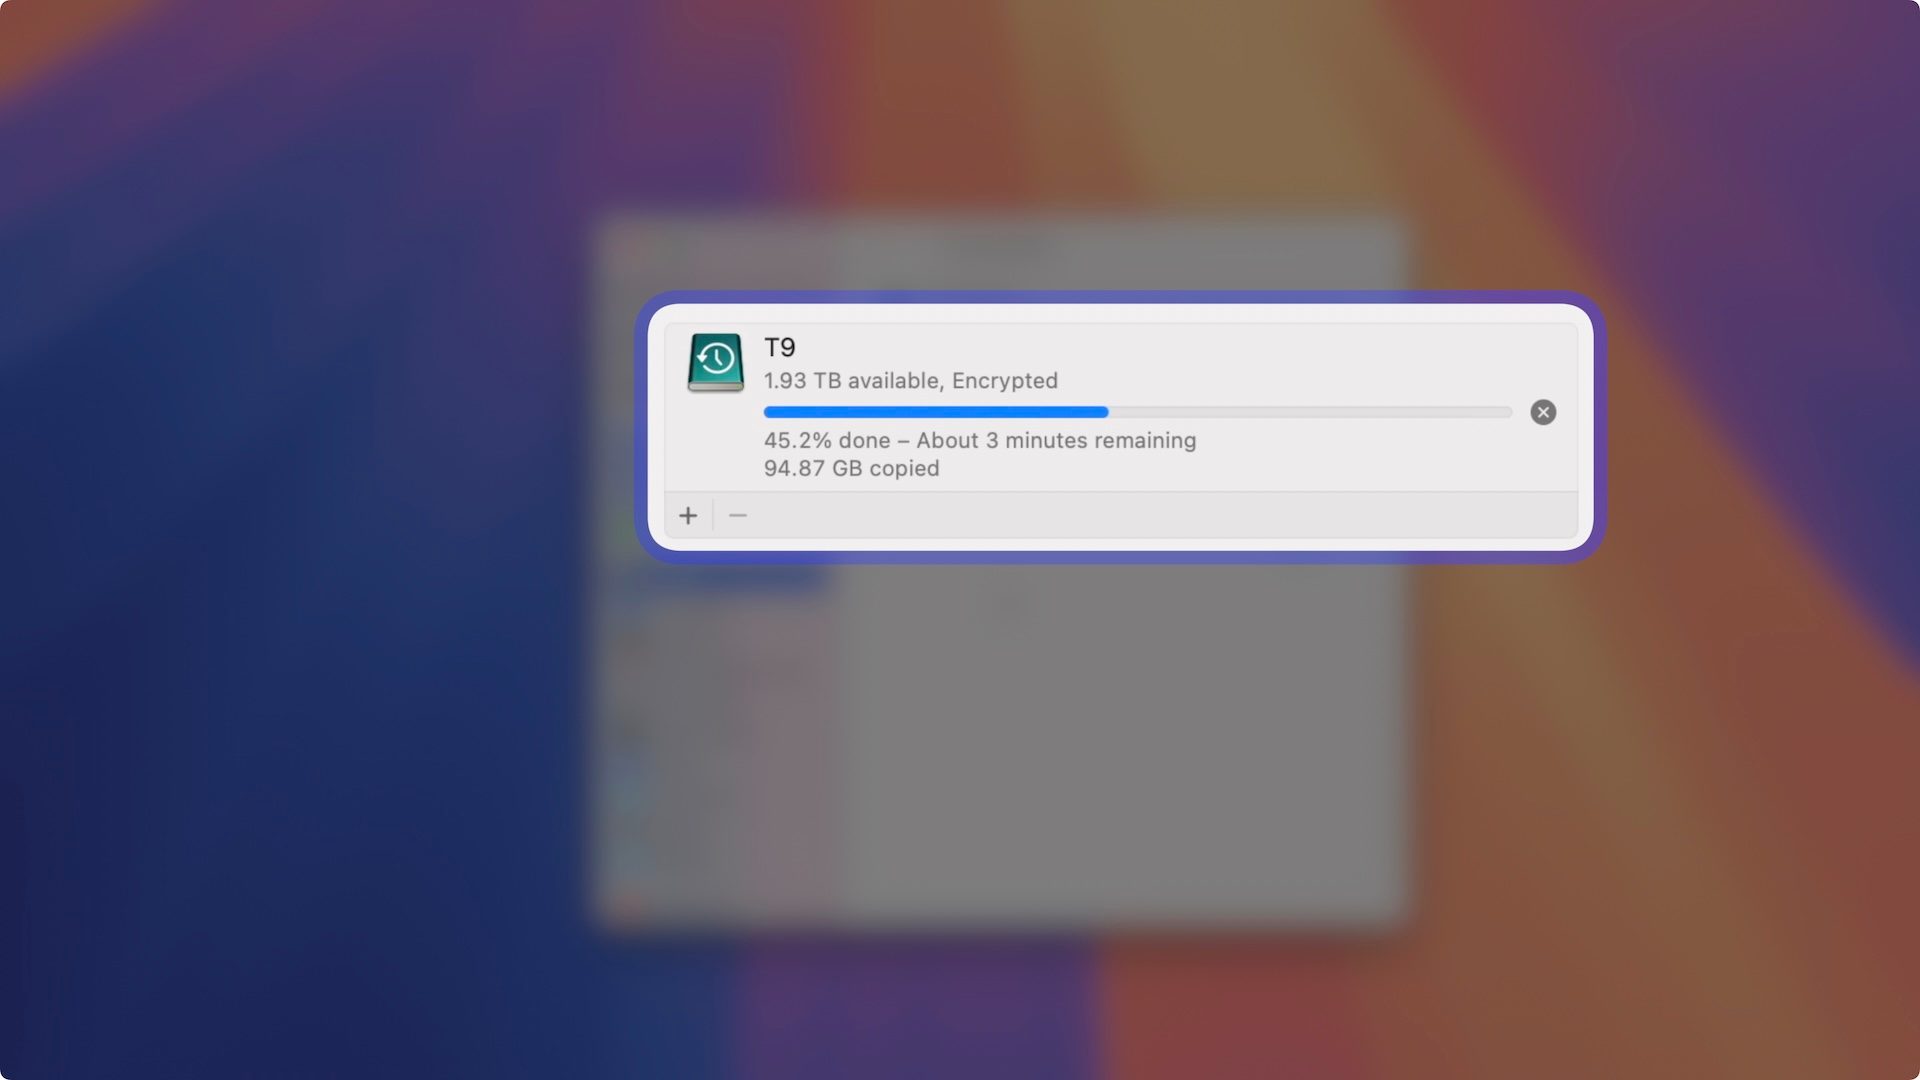
Step 5: Be sure Encrypt Backup is chosen, after which enter and confirm a brand new encryption password. Apple additionally requires you to fill out the “trace” area. Click on Finished to save lots of the adjustments and the Time Machine backup will begin getting ready.
Step 6: The Time Machine backup will robotically start after 60 seconds, or you’ll be able to pressure it to start out by clicking Time Machine within the menu bar and deciding on Again Up Now.
Step 7: Confirm that the backup is accomplished by visiting Settings → Normal → Time Machine.
Step 8: Eject the Time Machine SSD out of your Mac to save lots of for later use.
Erase All Content material and Settings
That is an elective step, however because you’ll now not be utilizing the SSD that you simply plan to switch, I like to recommend deleting the drive earlier than eradicating. Guarantee that you’ve your information backed up first earlier than continuing.
Step 1: Go to Settings → Normal → Switch or Reset and click on Erase All Content material and Settings.
Step 2: Enter your Mac’s administrator password and click on Unlock.
Step 3: Click on Proceed on the Time Machine immediate, since it’s best to have already backed up your Mac.
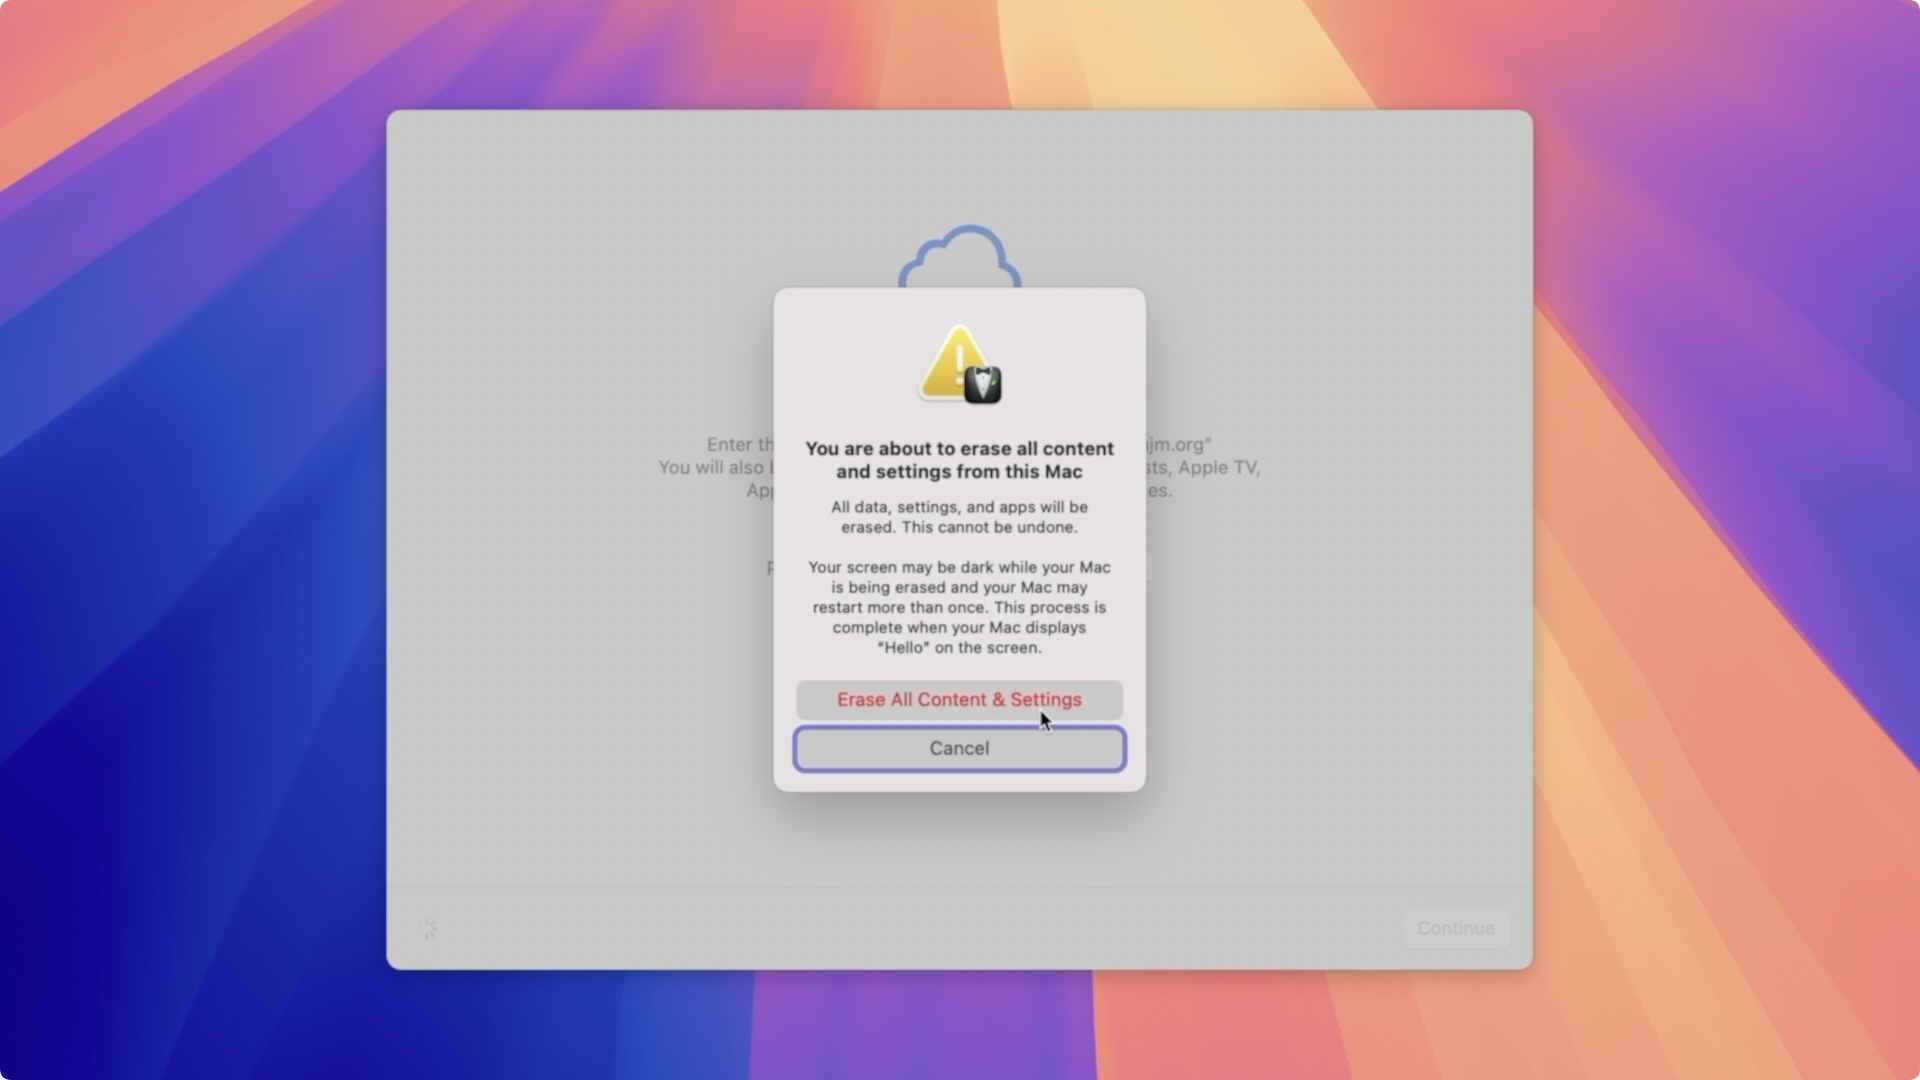
Step 4: Click on Proceed on the Erase All Contents & Settings web page.
Step 5: When you’re signed in to iCloud, enter your Apple Account password to signal out and disable Activation Lock. Click on Proceed.
Step 6: Click on Erase All Content material & Settings. The SSD shall be erased, and the Mac will reboot.
Set up the brand new SSD
Step 1: Shut down your M4 Mac mini and take away all cables.
Step 2: Relaxation the Mac mini face down on a flat, comfortable floor to keep away from marring the aluminum case.
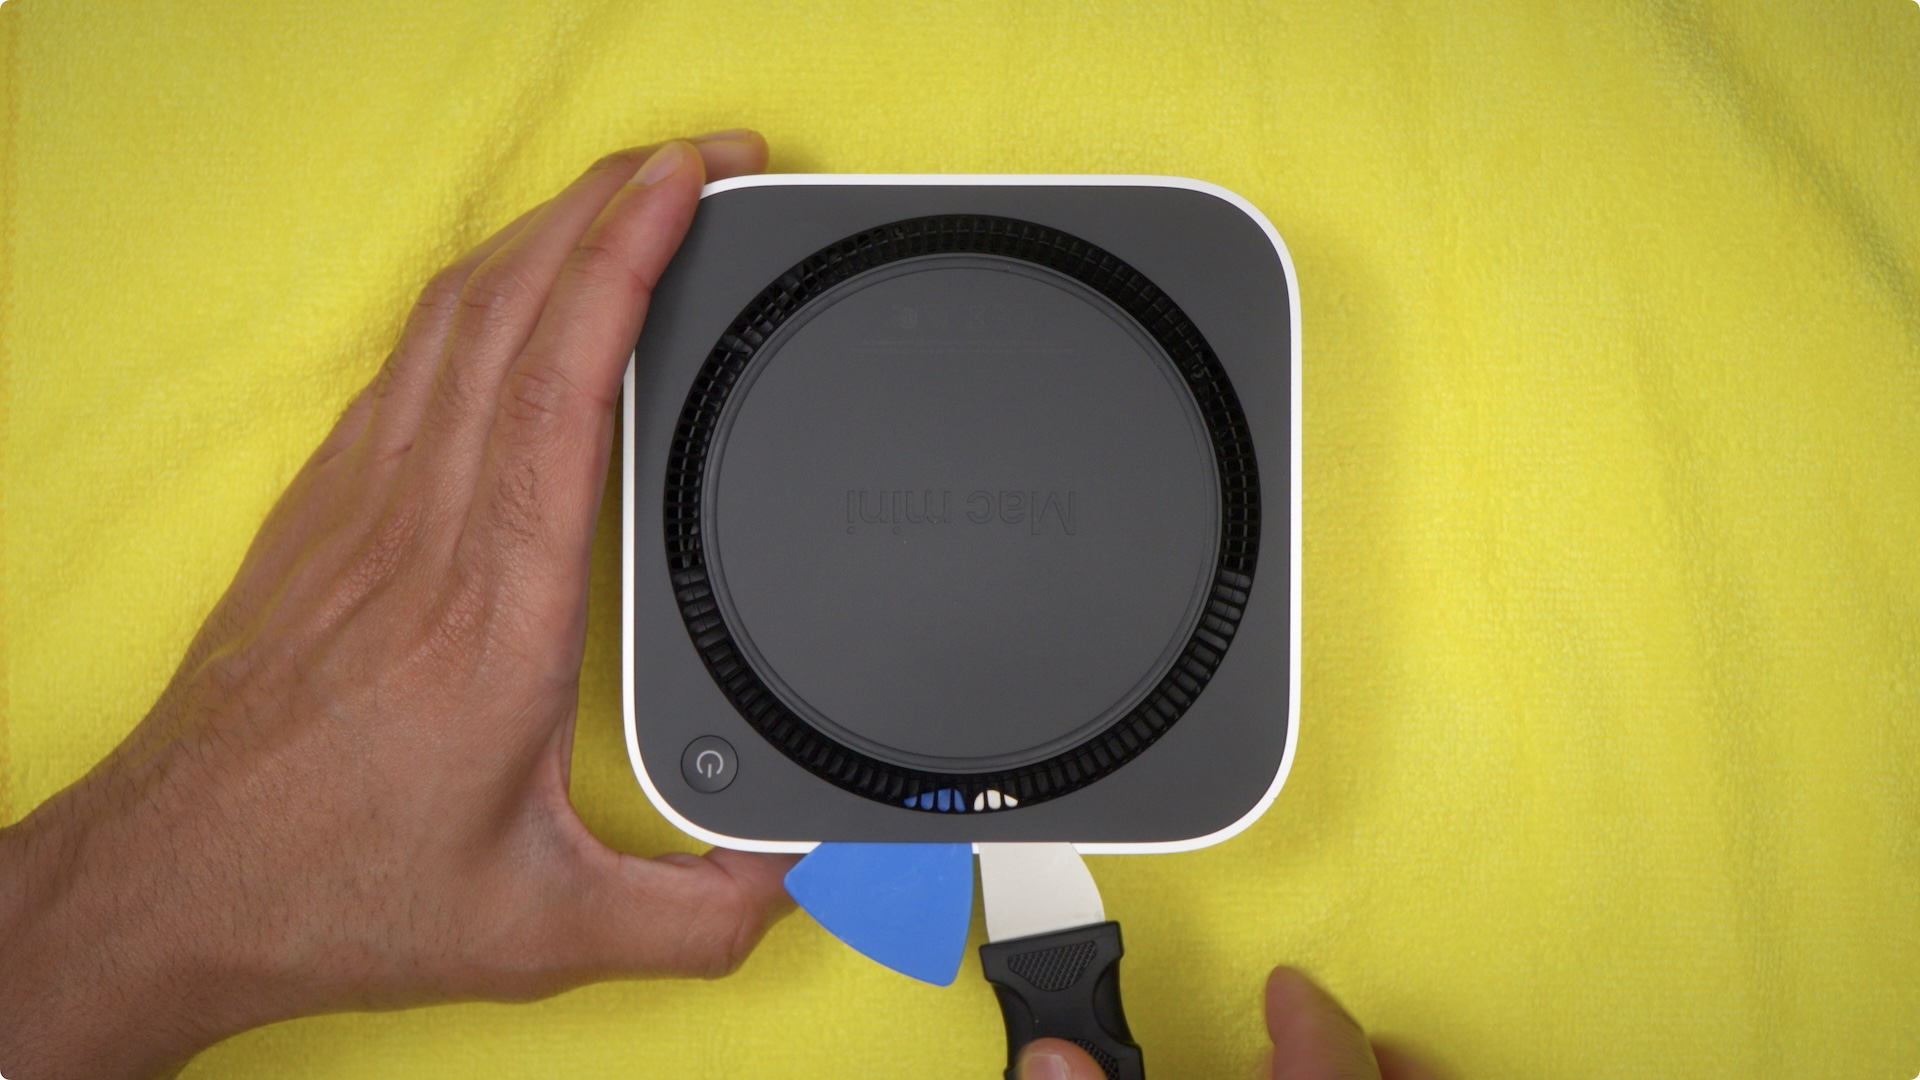
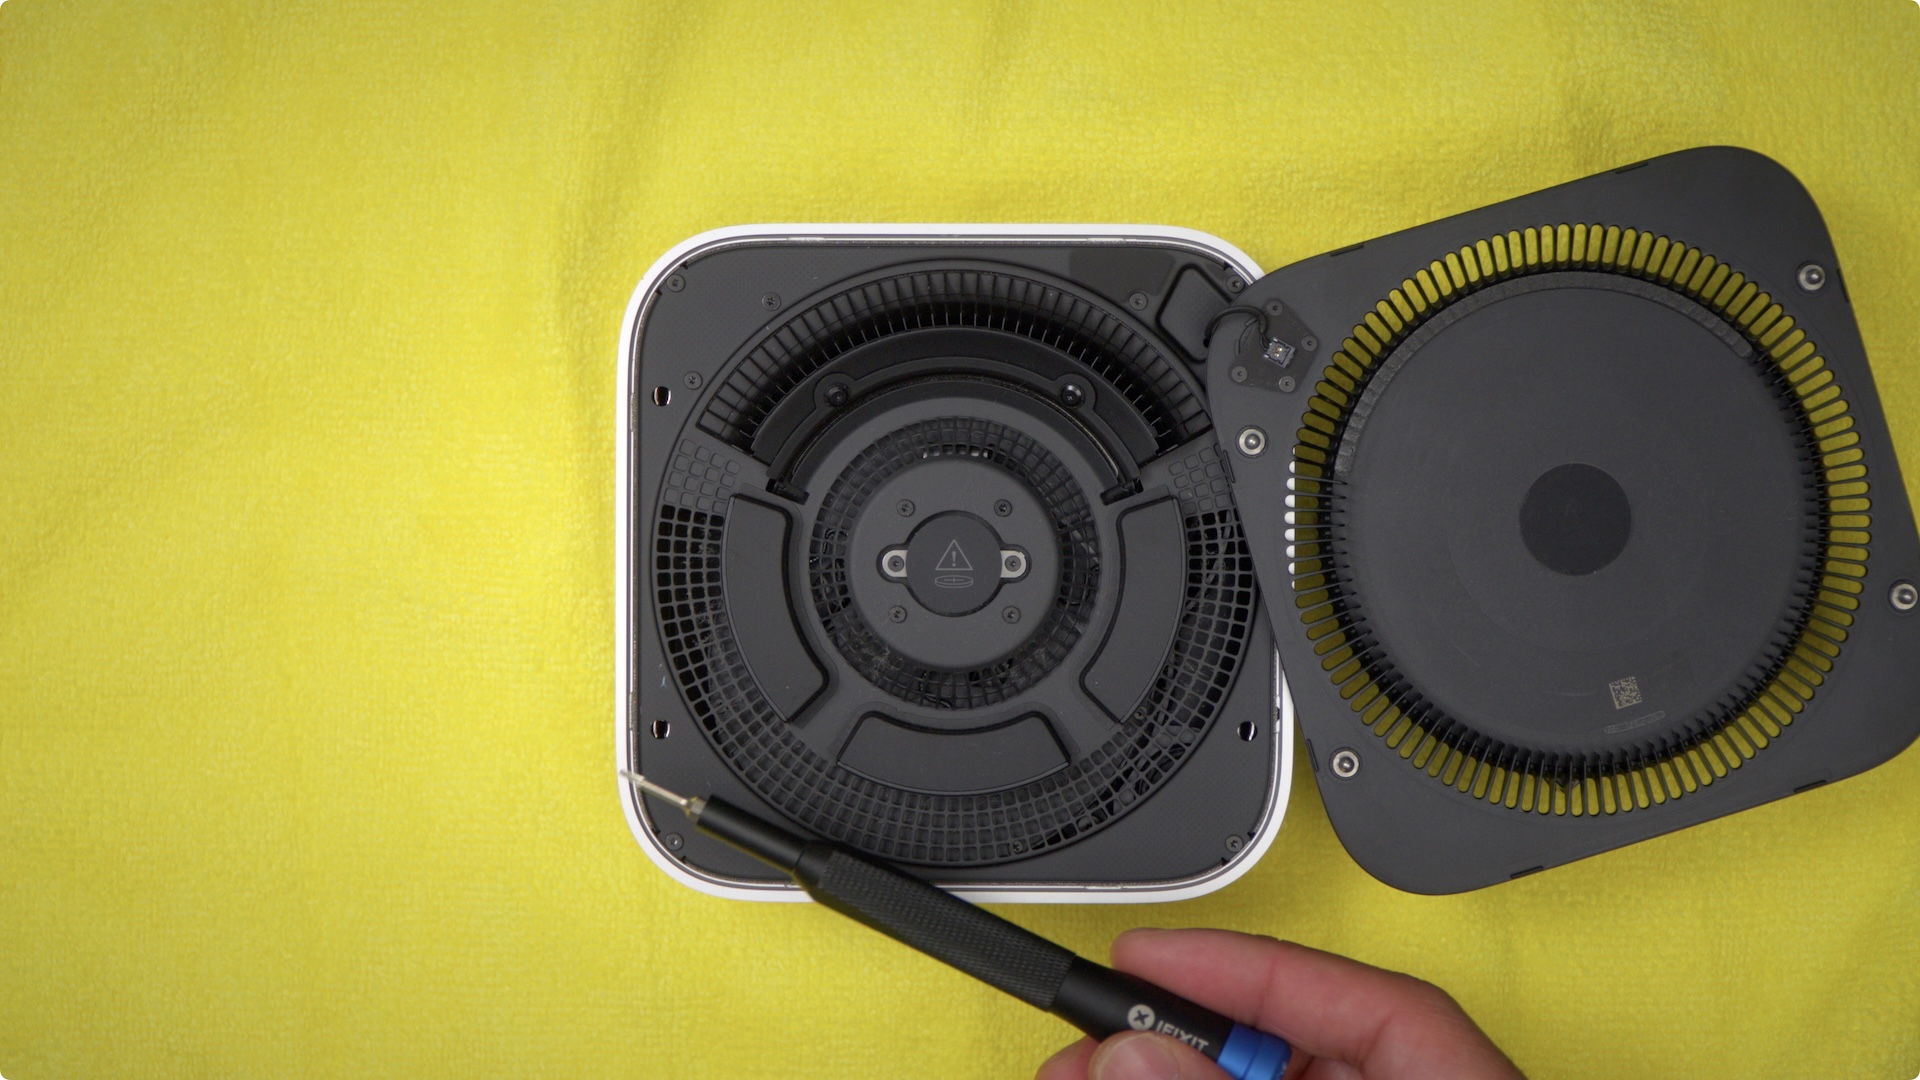
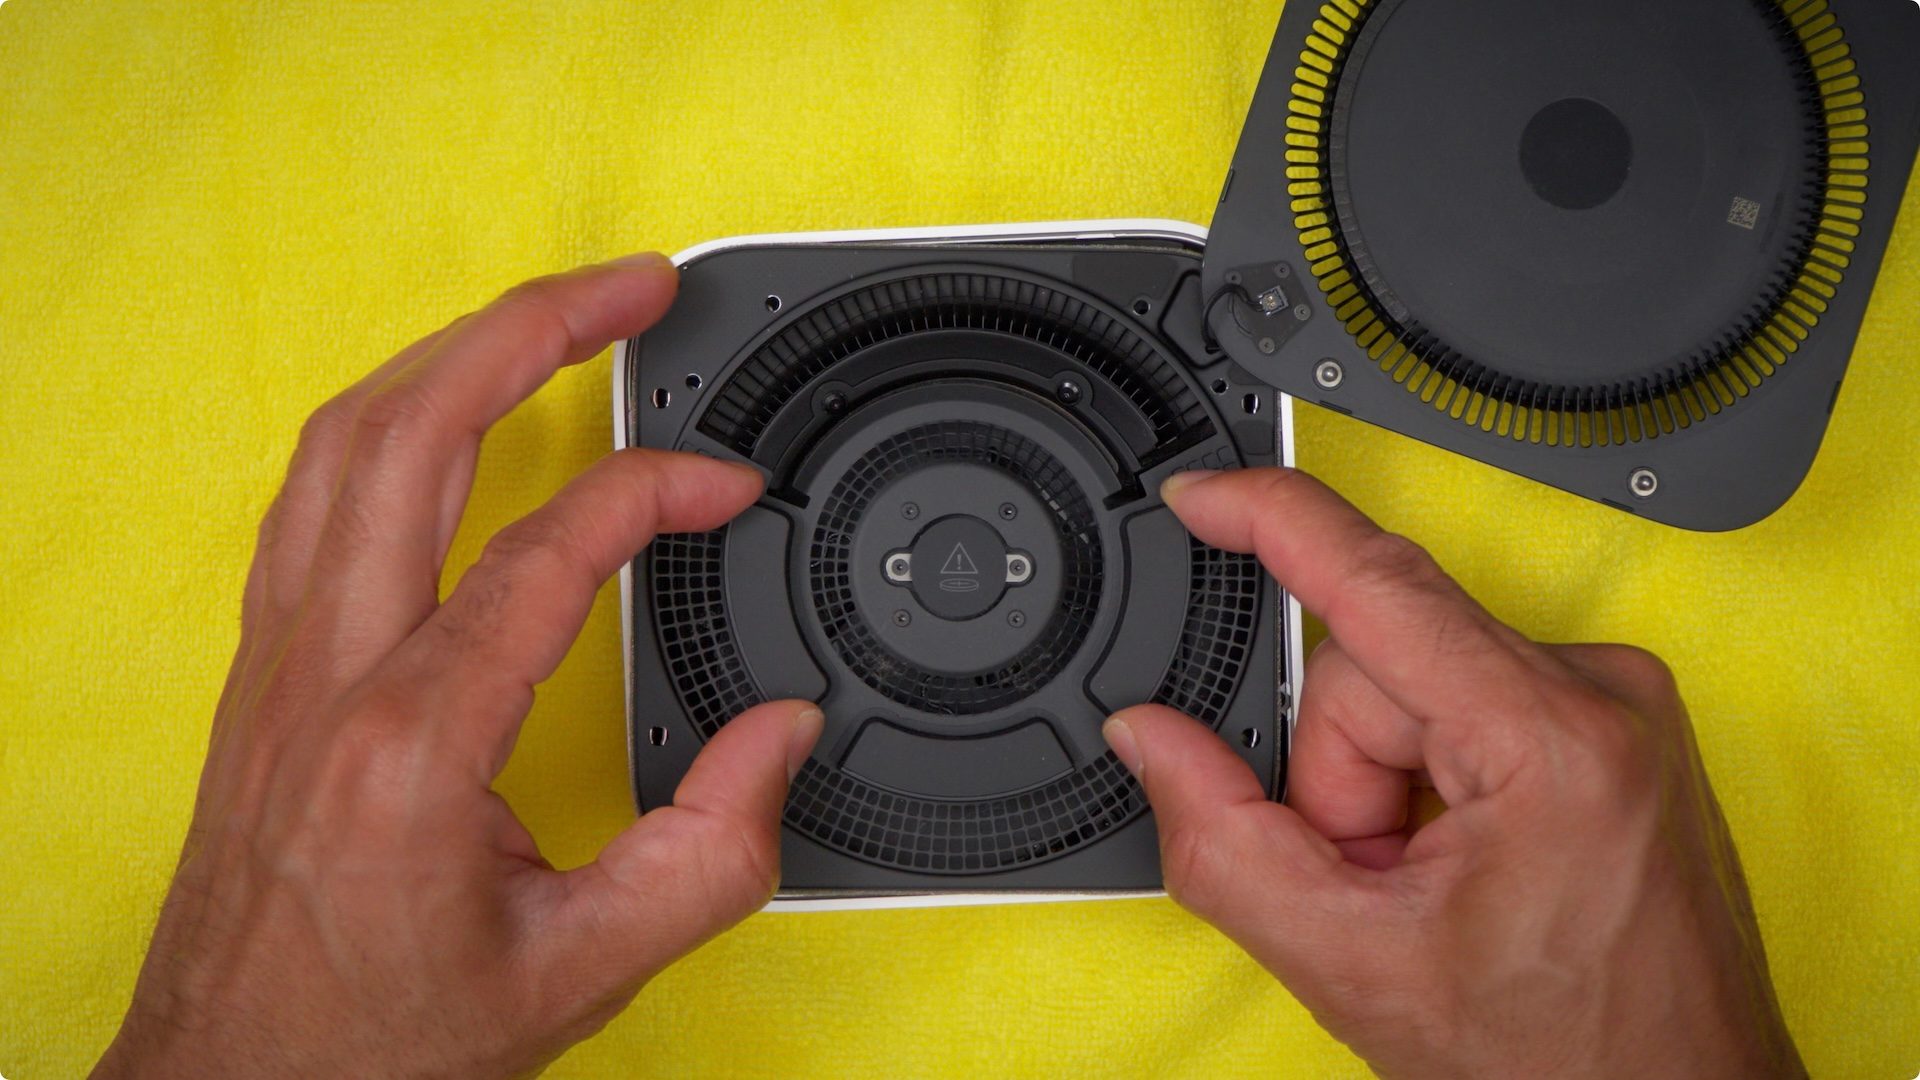
Step 3: Fastidiously insert the Jimmy software between the hole the place the aluminum chassis meets the plastic, black backside cowl, and pry the duvet to create a spot between the 2.
Step 4: Insert a plastic opening choose and take away the Jimmy software.
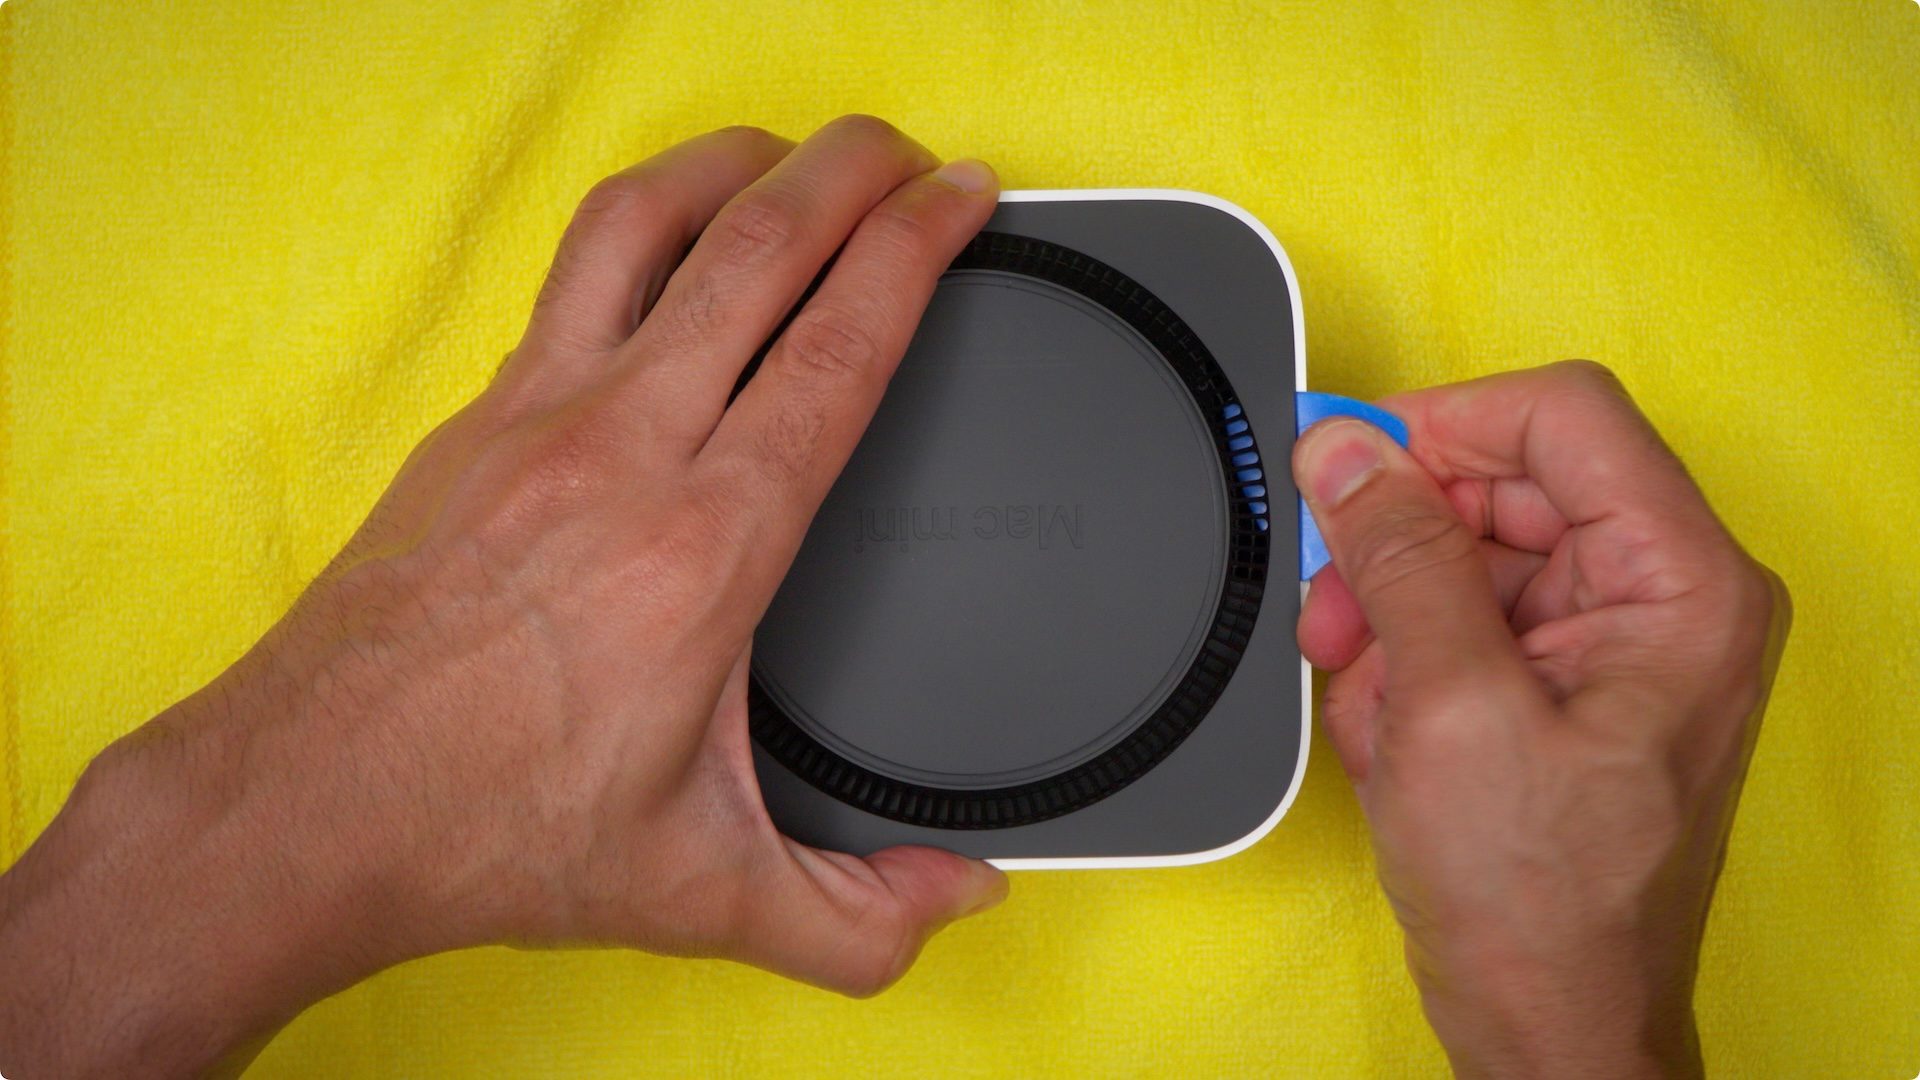
Step 5: Slide the opening choose across the cowl till it encounters every of the 4 clips that safe the duvet to the chassis. Twist the opening choose barely to come out every clip. Take particular care when sliding across the energy button to keep away from severing the facility button cable.
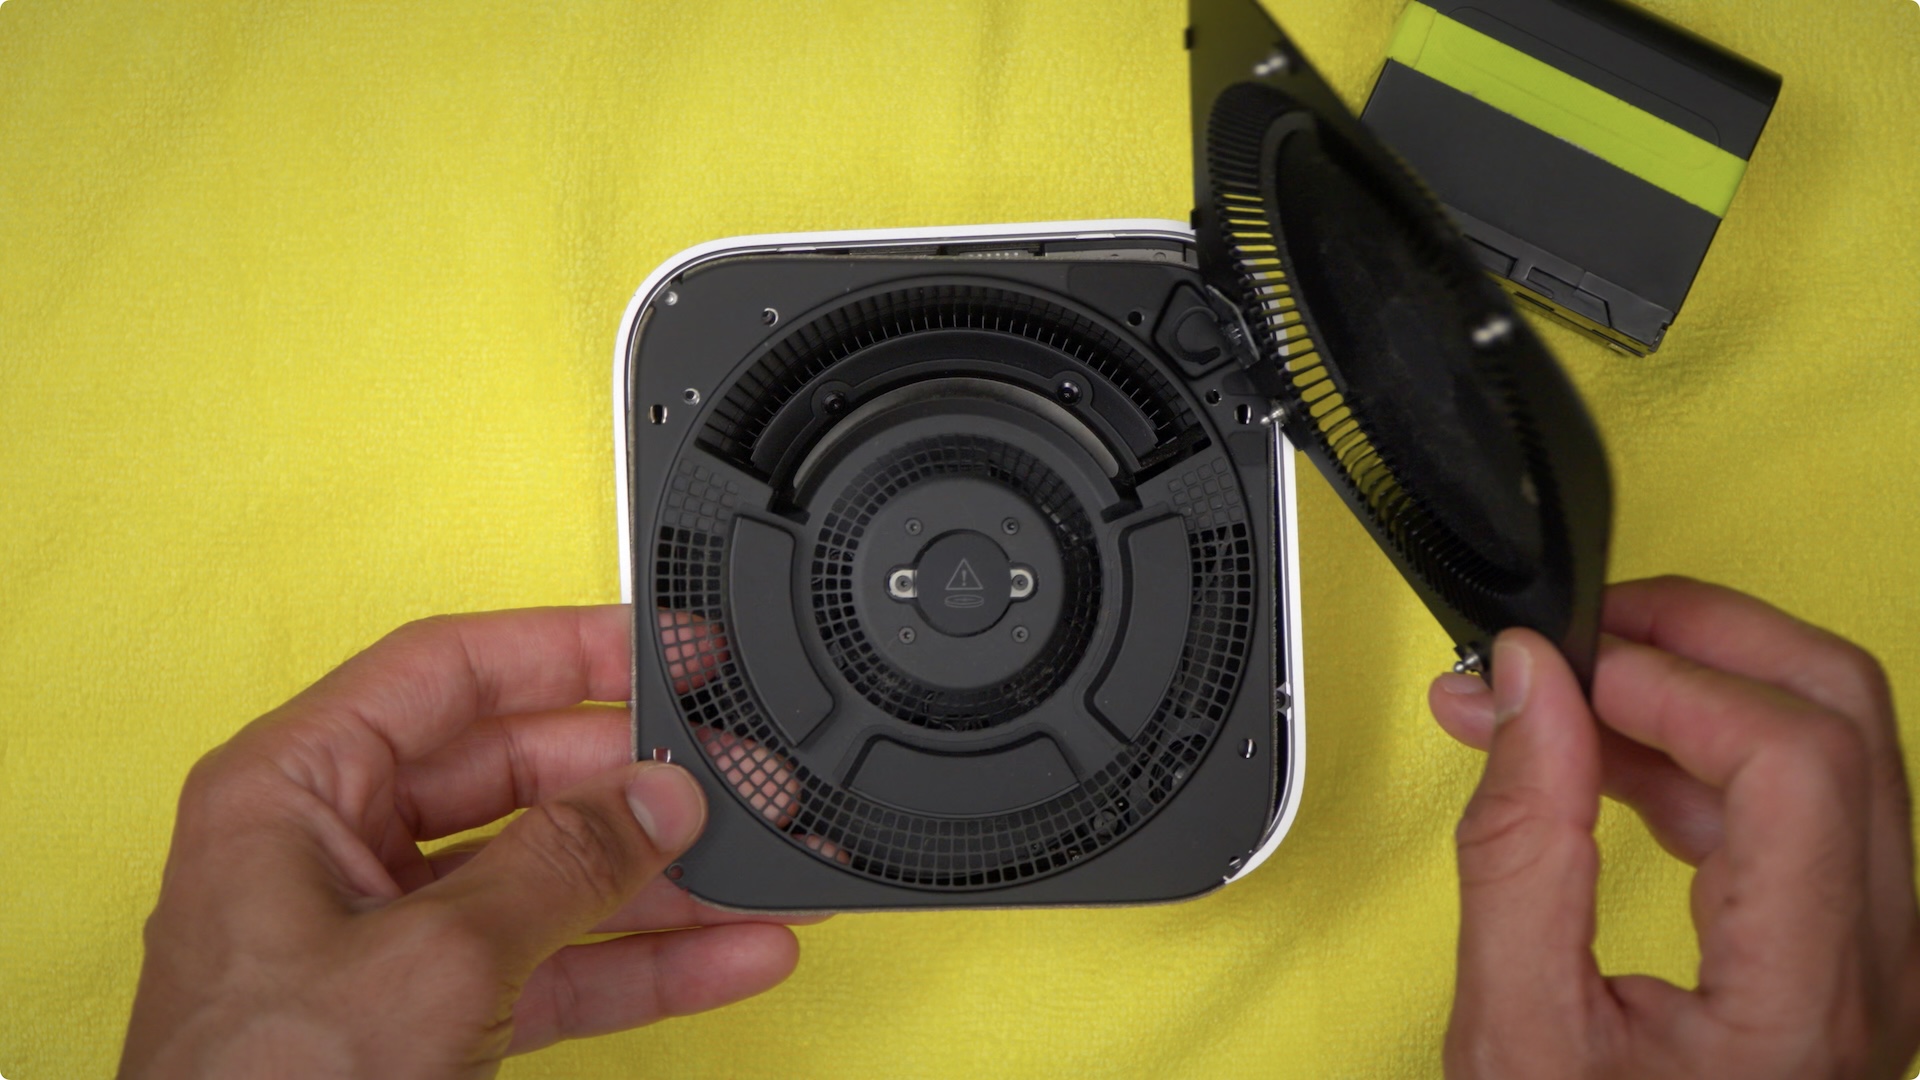
Step 6: Carry the sting of the duvet that’s on the alternative nook of the facility button, and flip it over to disclose the underside of the again cowl. Relaxation one thing below the underside cowl so that you could entry the inside plate screws with out placing pressure on the facility button cable.
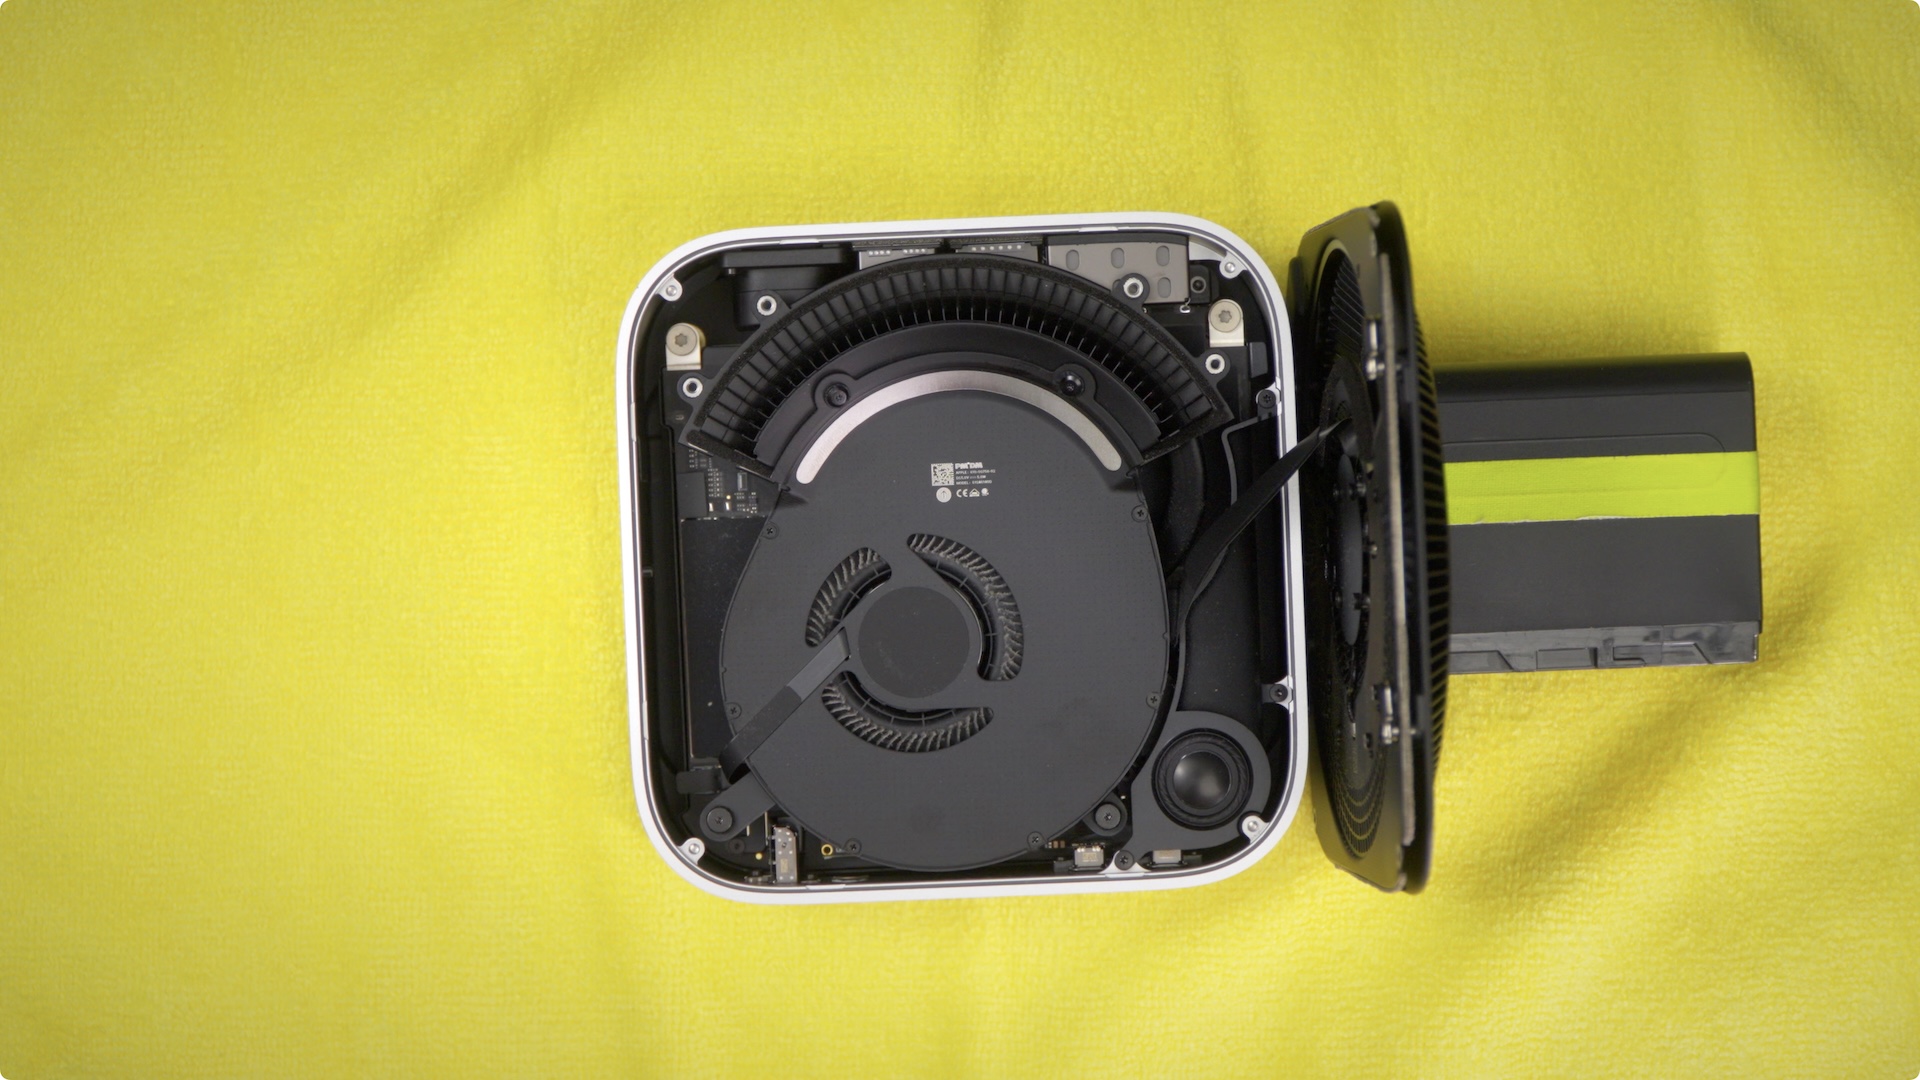
Step 7: Take away all eight of the inside plate screws utilizing a T5 Torx driver. All the screws for the inside plate are the identical, so don’t fear about remembering the place every screw was.
Step 8: Slide the inside plate down and away from the warmth sink to loosen it. Watch out, as a result of there’s a ribbon cable that connects to the inside plate. Flip the again cowl again on prime of the inside plate, after which relaxation each the inside plate and again cowl on the facet of the Mac mini with out placing stress on the ribbon cable.
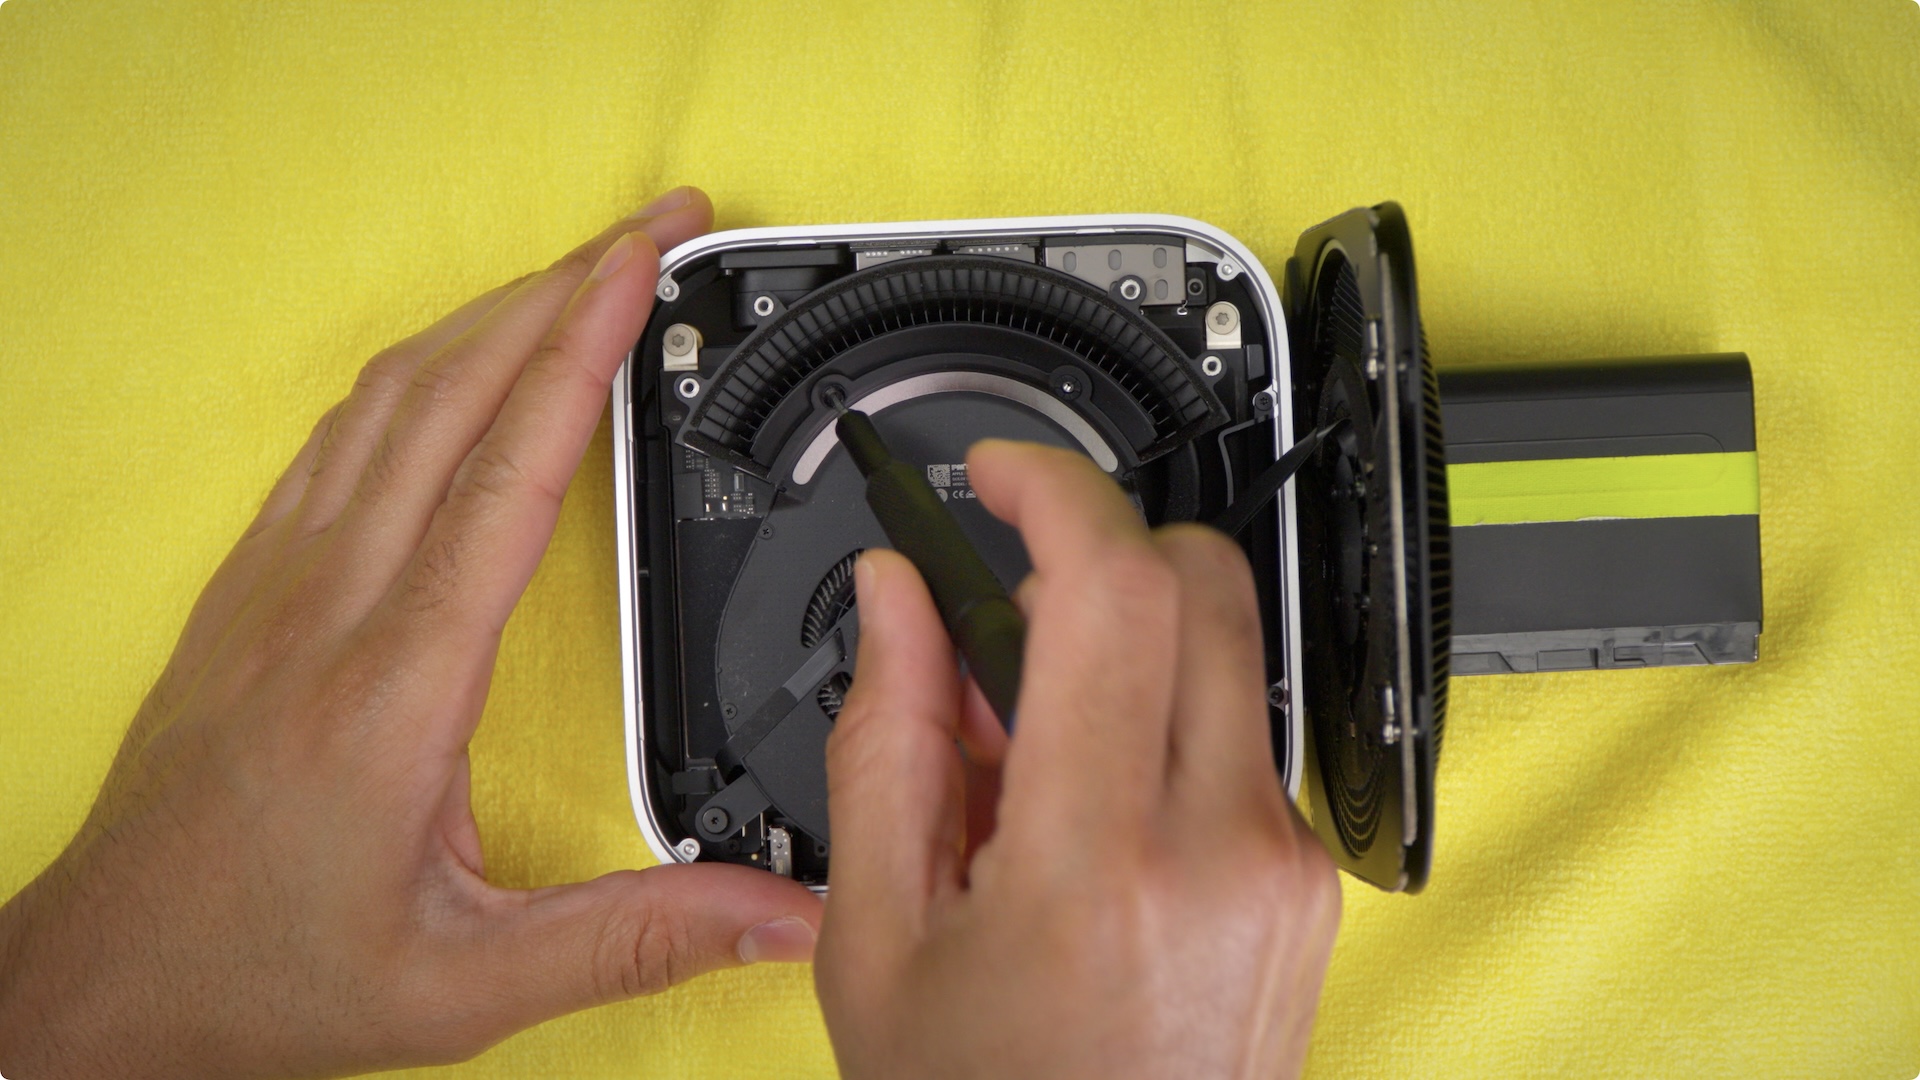
Step 9: Utilizing the T3 Torx driver, take away the 4 fan screws. There are two brief screws on the highest, and two longer screws on the underside.
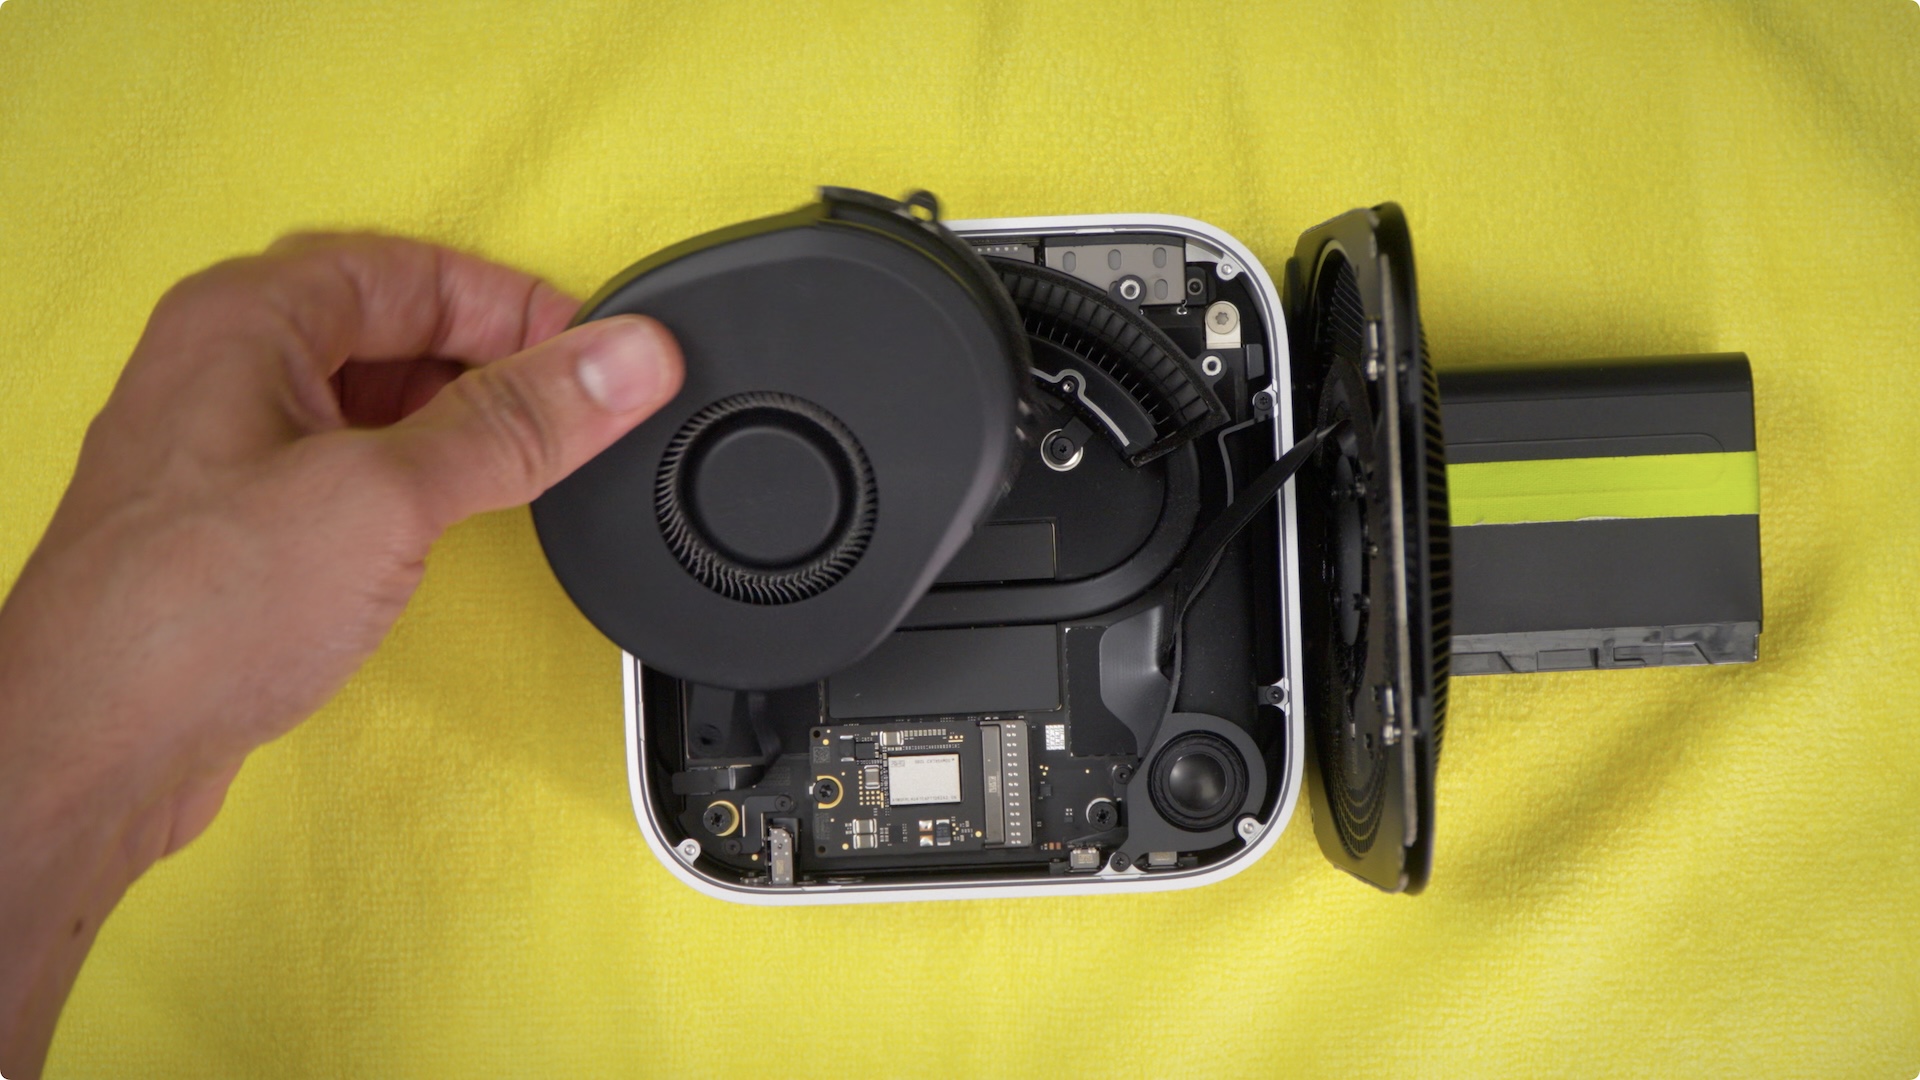
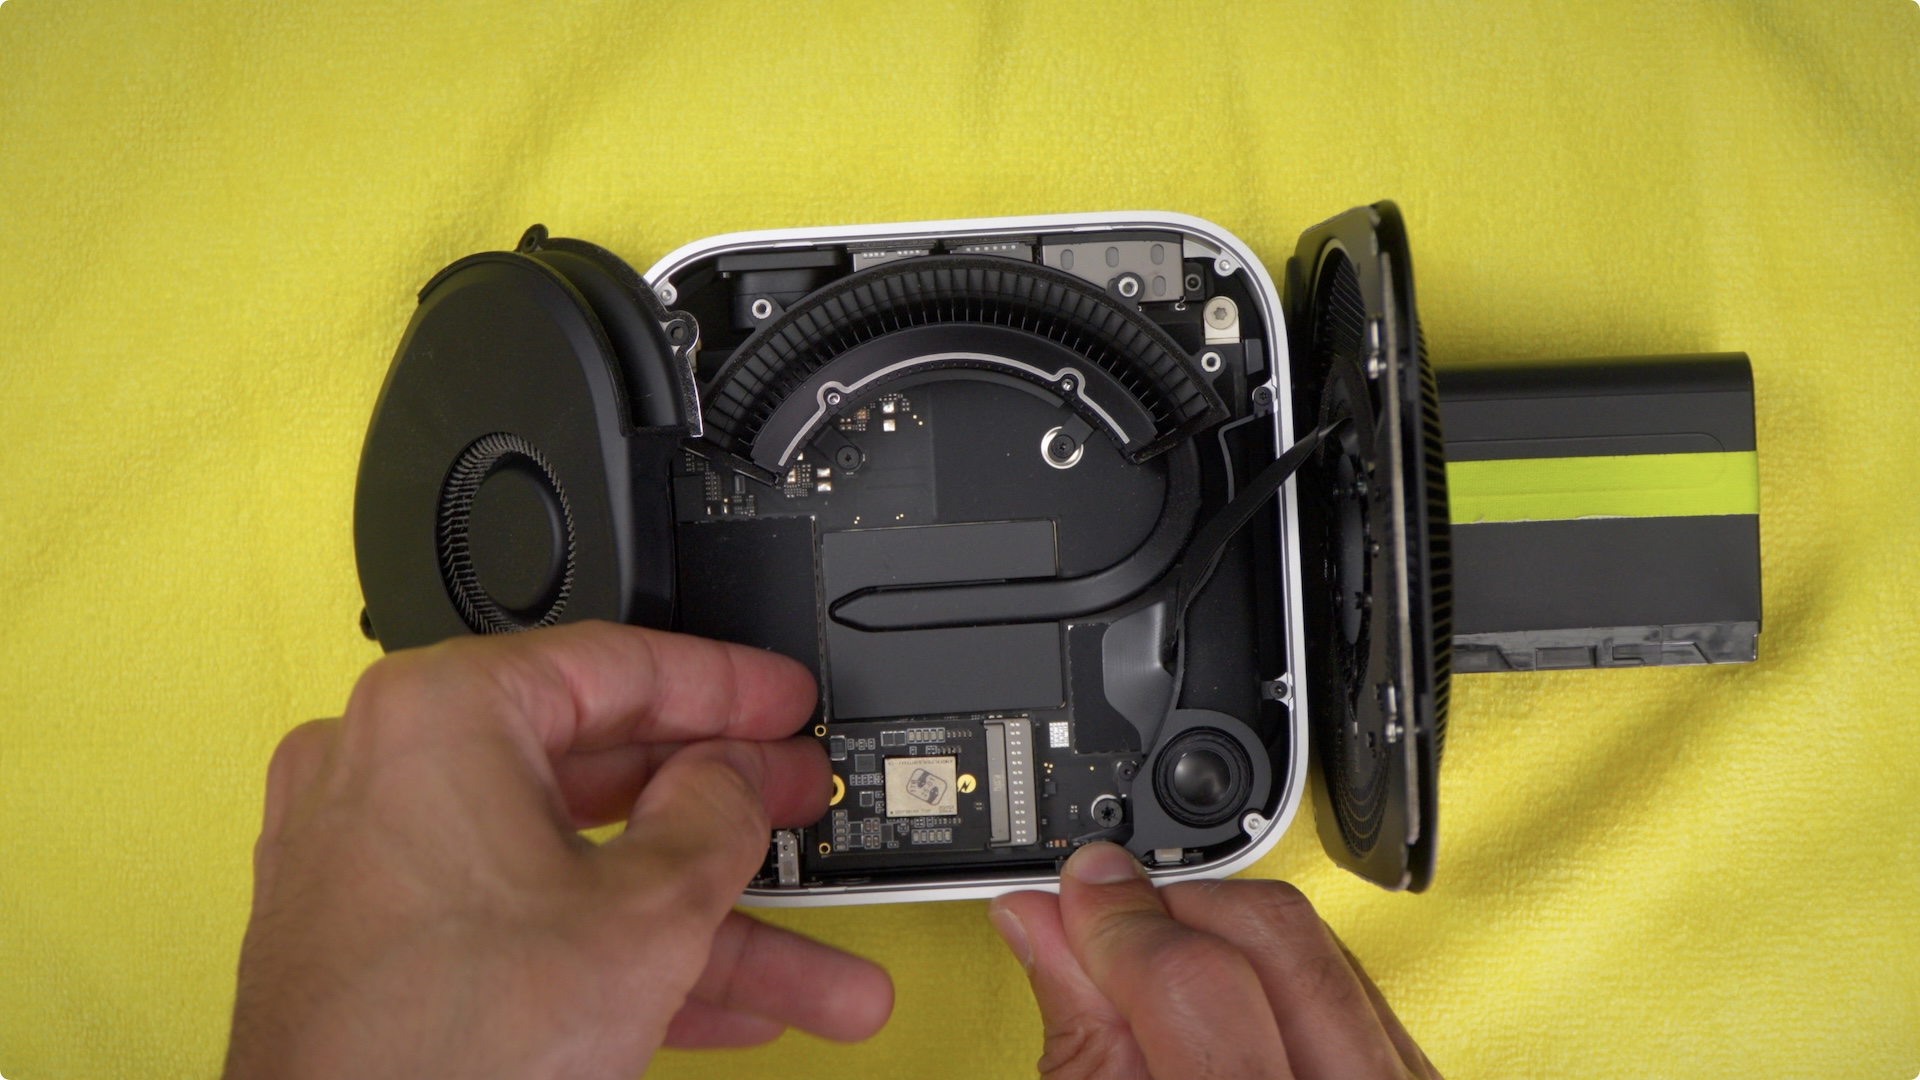
Step 11: Carry the fan and flip it over to show the ribbon cable connection, and relaxation it on the sting of the Mac mini chassis with out placing pressure on the ribbon cable.
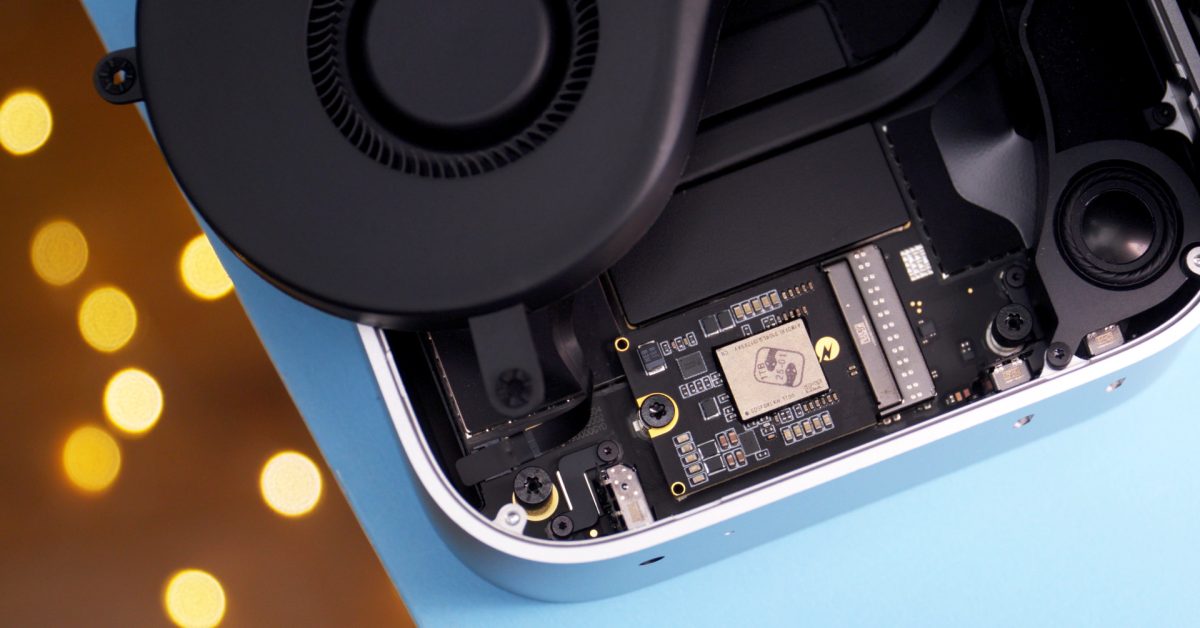
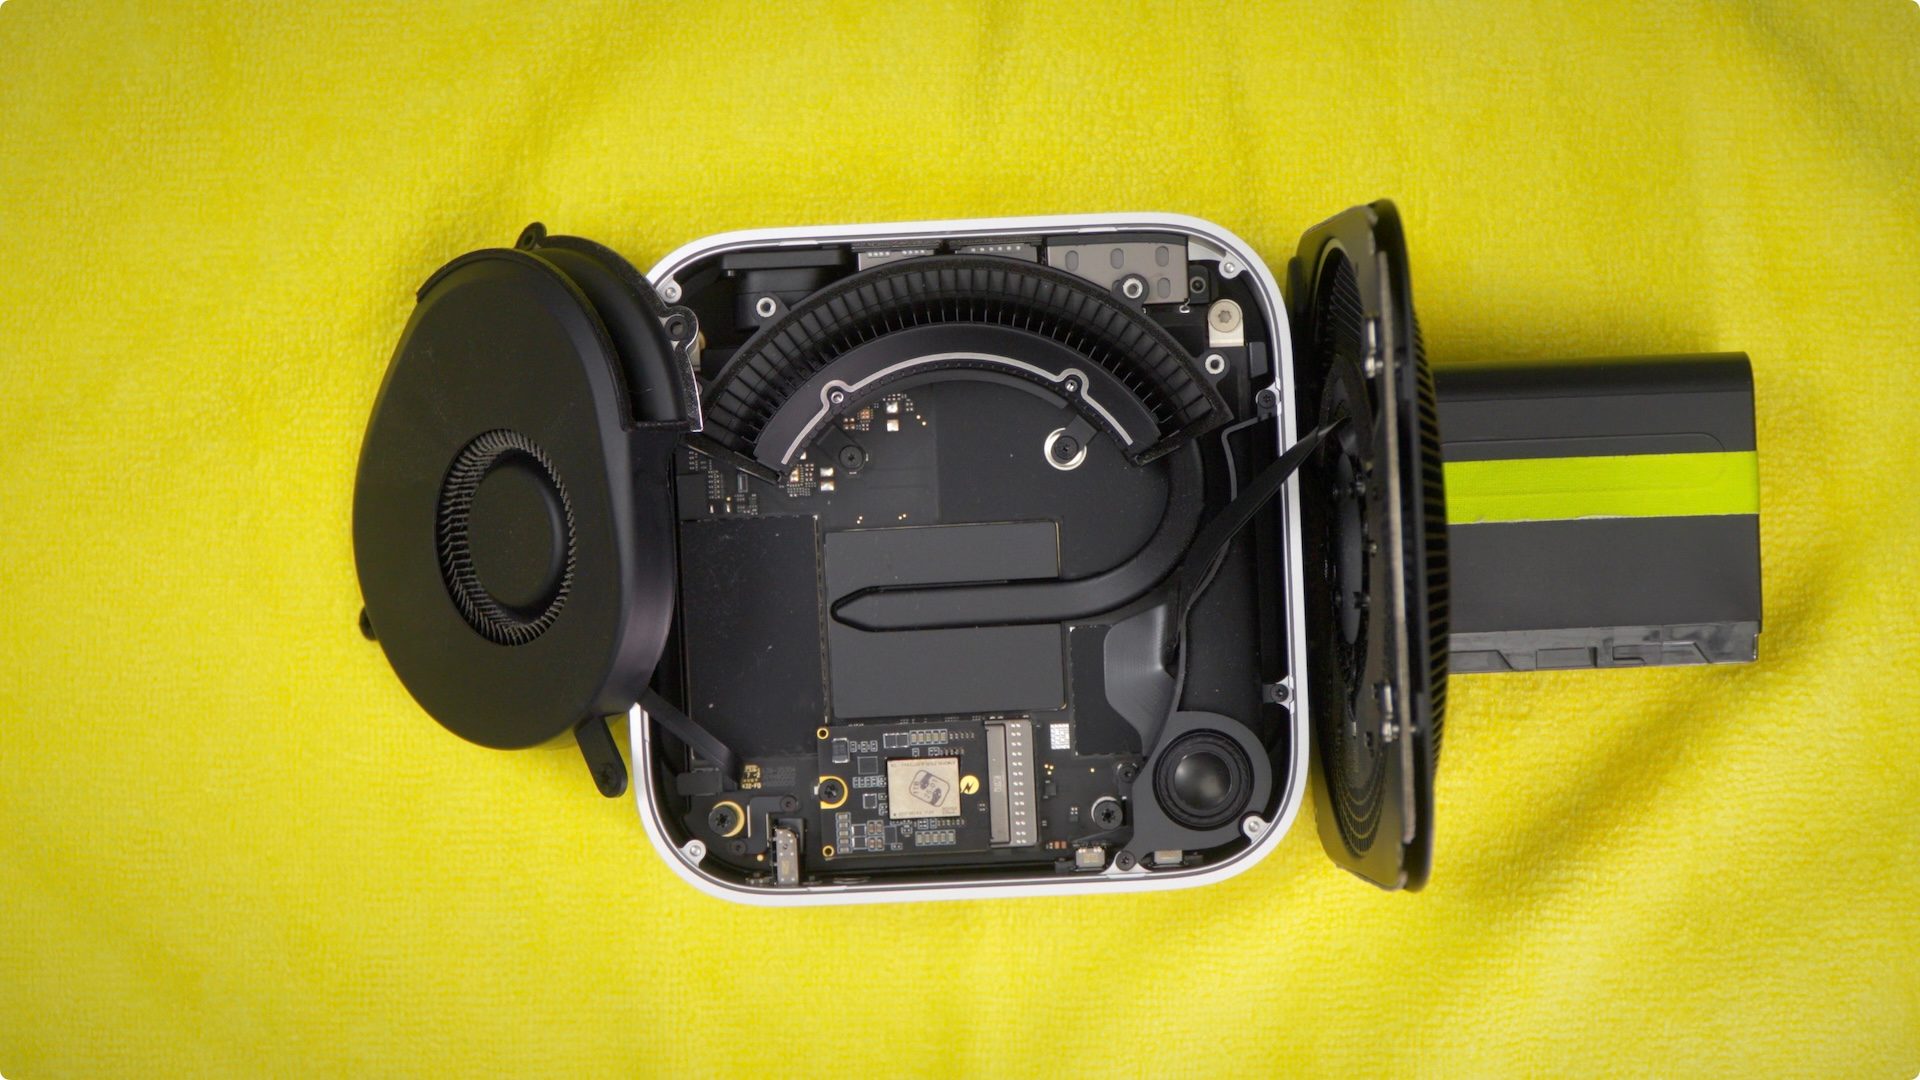
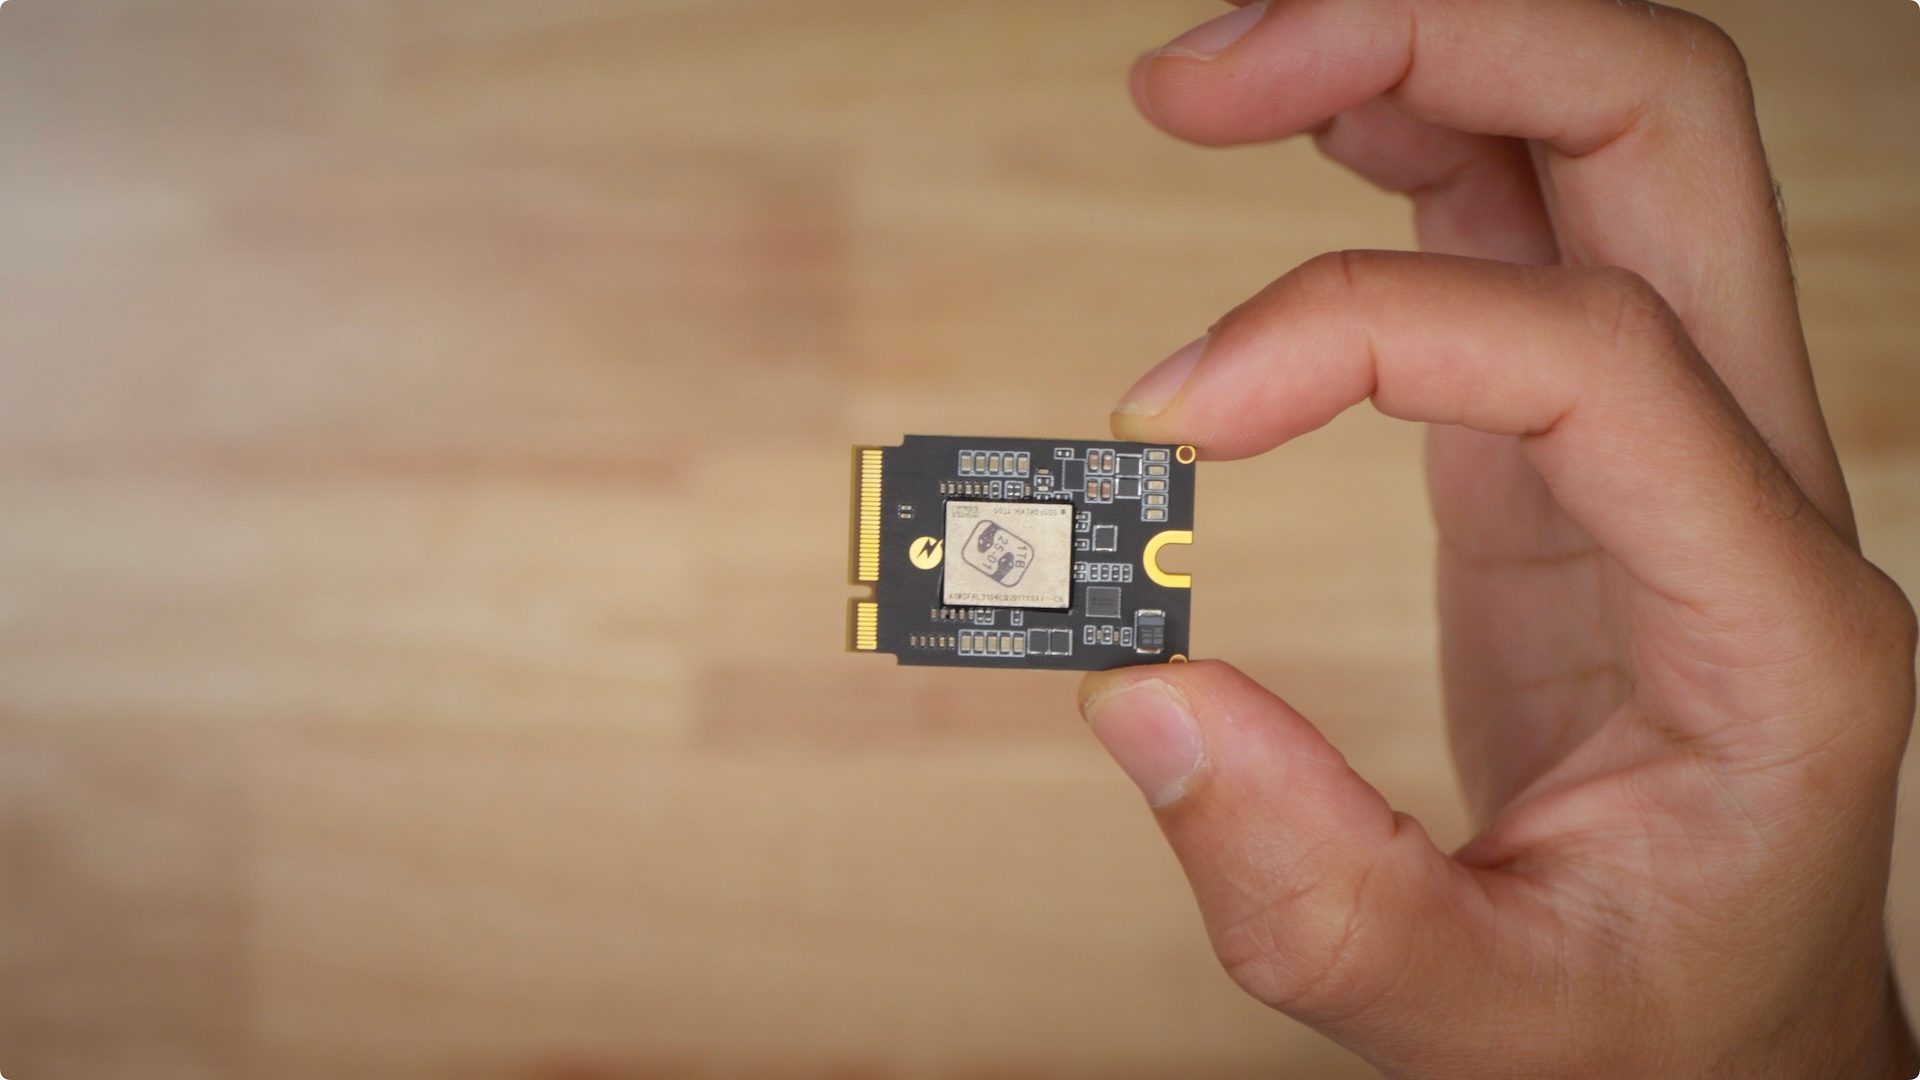
Step 12: Take away the screw securing the SSD with the T8 Torx driver, and take away the SSD from its socket.
Step 13: Insert the 2TB SSD into the socket securely, and safe it utilizing the T8 screw.
Step 14: Reinstall the fan, and put the inside plate and again cowl again on with out securing them down. Earlier than securing the inside plate and again cowl, it’s a good suggestion to check the set up to ensure it was profitable.
DFU Restore
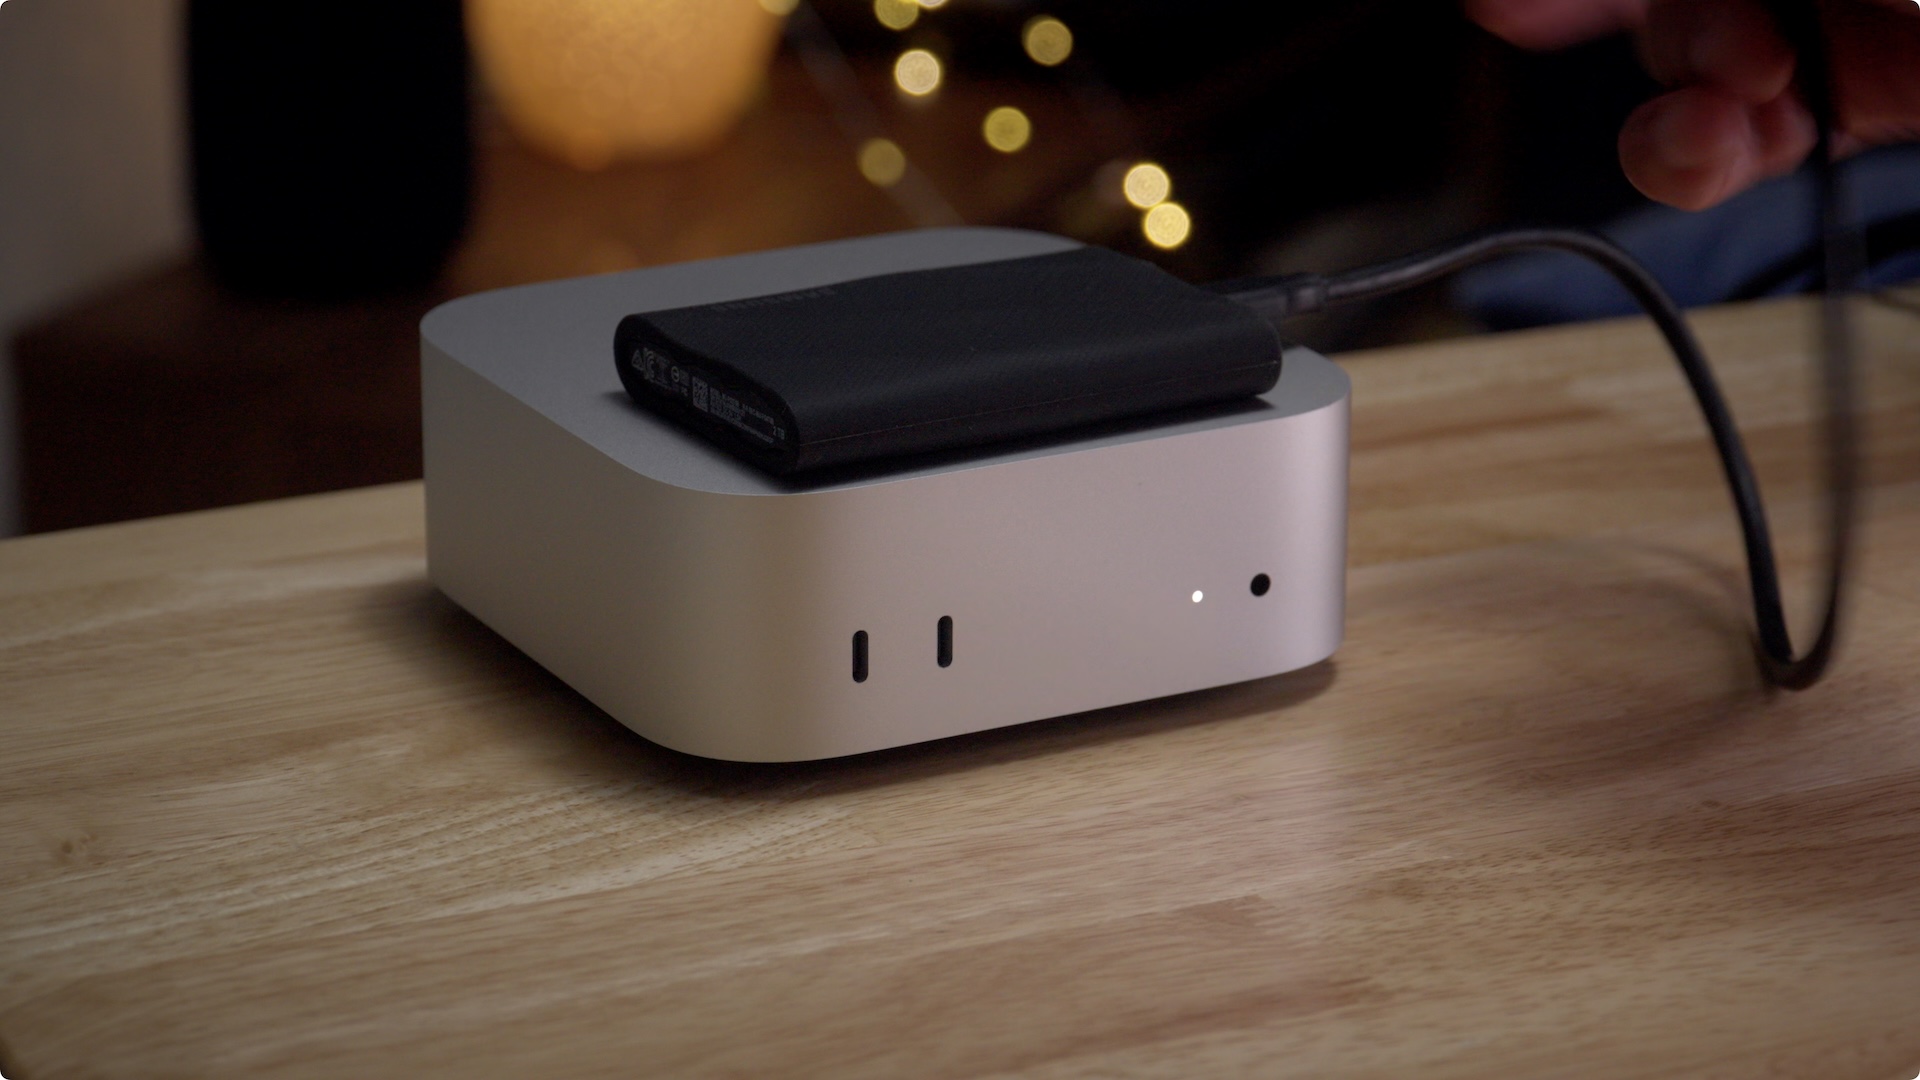
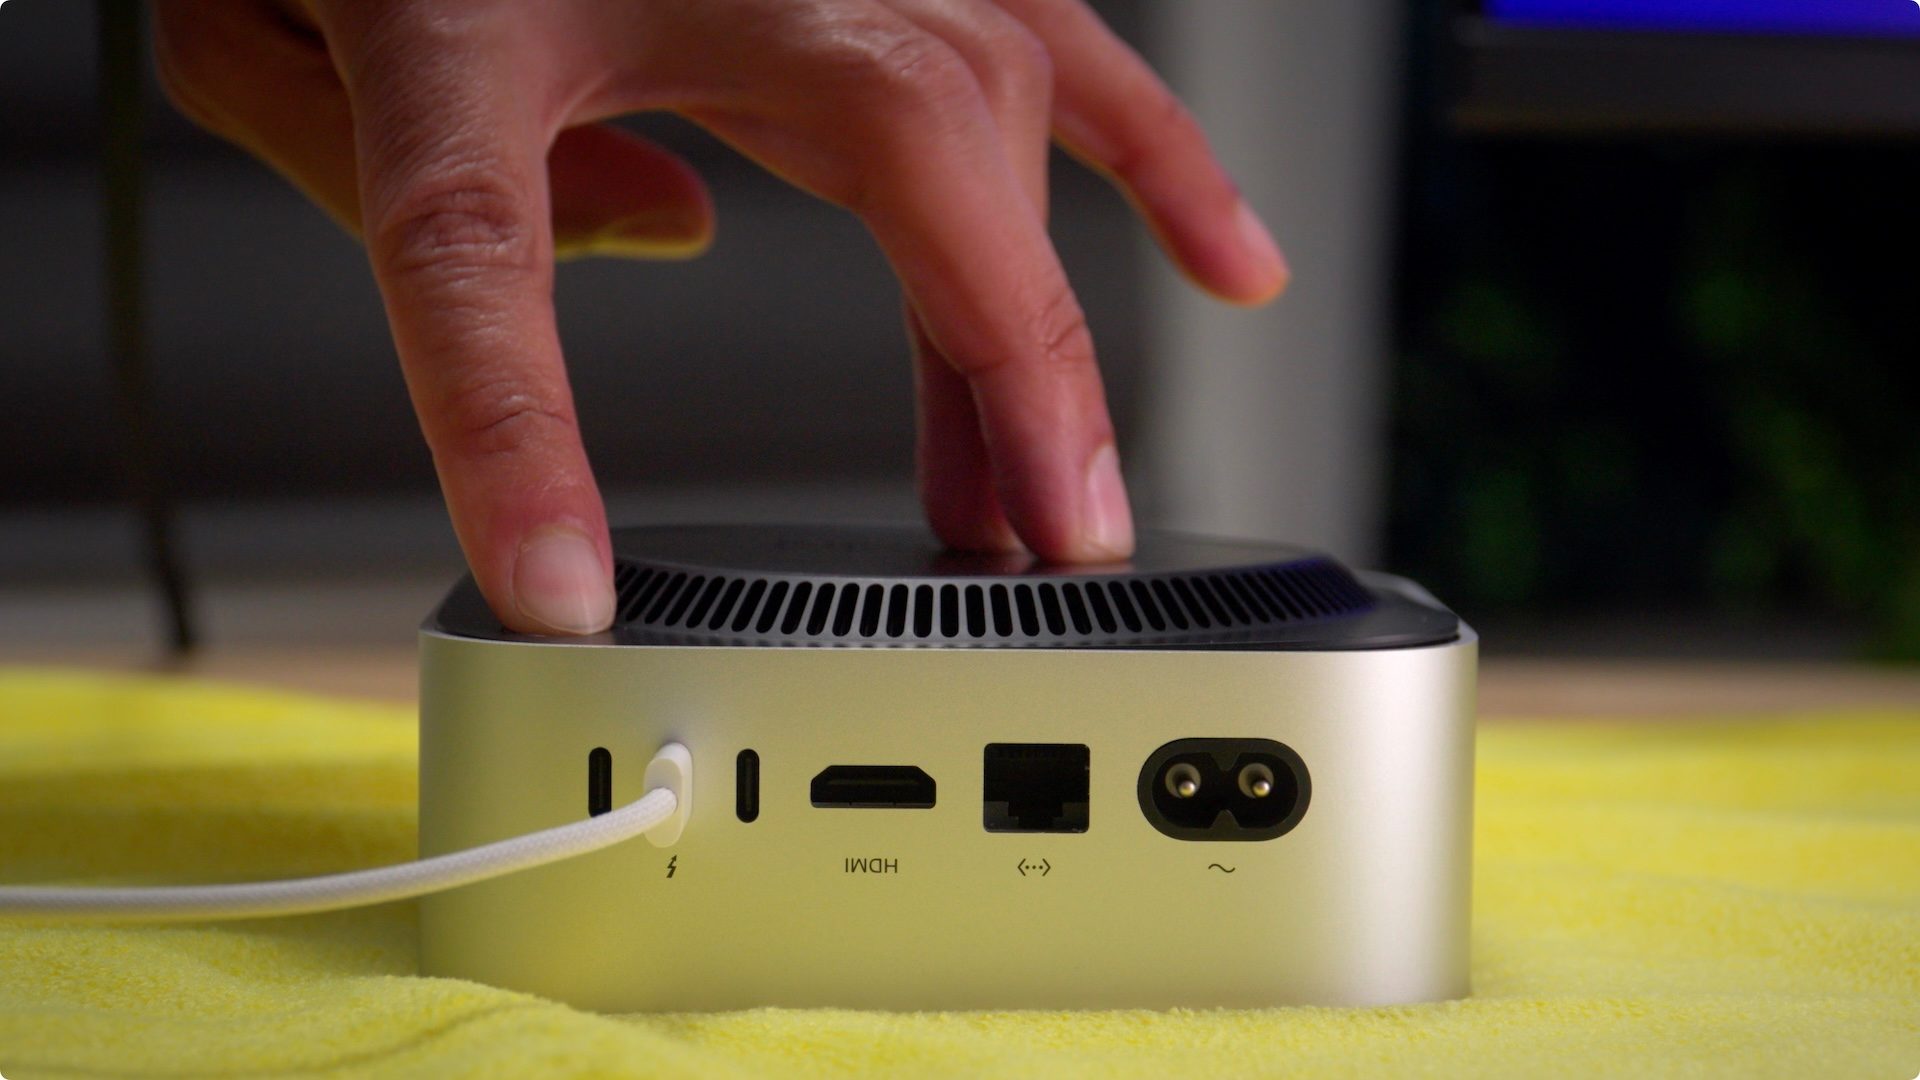
Step 1: With the USB-C to USB-C cable, connect with the center Thunderbolt port on the rear of the M4 Mac mini. This port is designated for DFU restores through macOS.
Step 2: Plug the opposite finish of the USB-C cable right into a Mac working macOS Sonoma or later.
Step 3: Maintain the facility button on the upgraded Mac mini, and whereas persevering with to carry the facility button, plug within the energy cable.
Step 4: Proceed holding the facility button till the Mac you’re utilizing to carry out the restore acknowledges the linked Mac in DFU mode through Finder. You must also discover a flashing orange gentle on the entrance of the upgraded Mac mini. If macOS first exhibits an alert asking you to permit the accent to attach, launch the facility button and click on Permit.
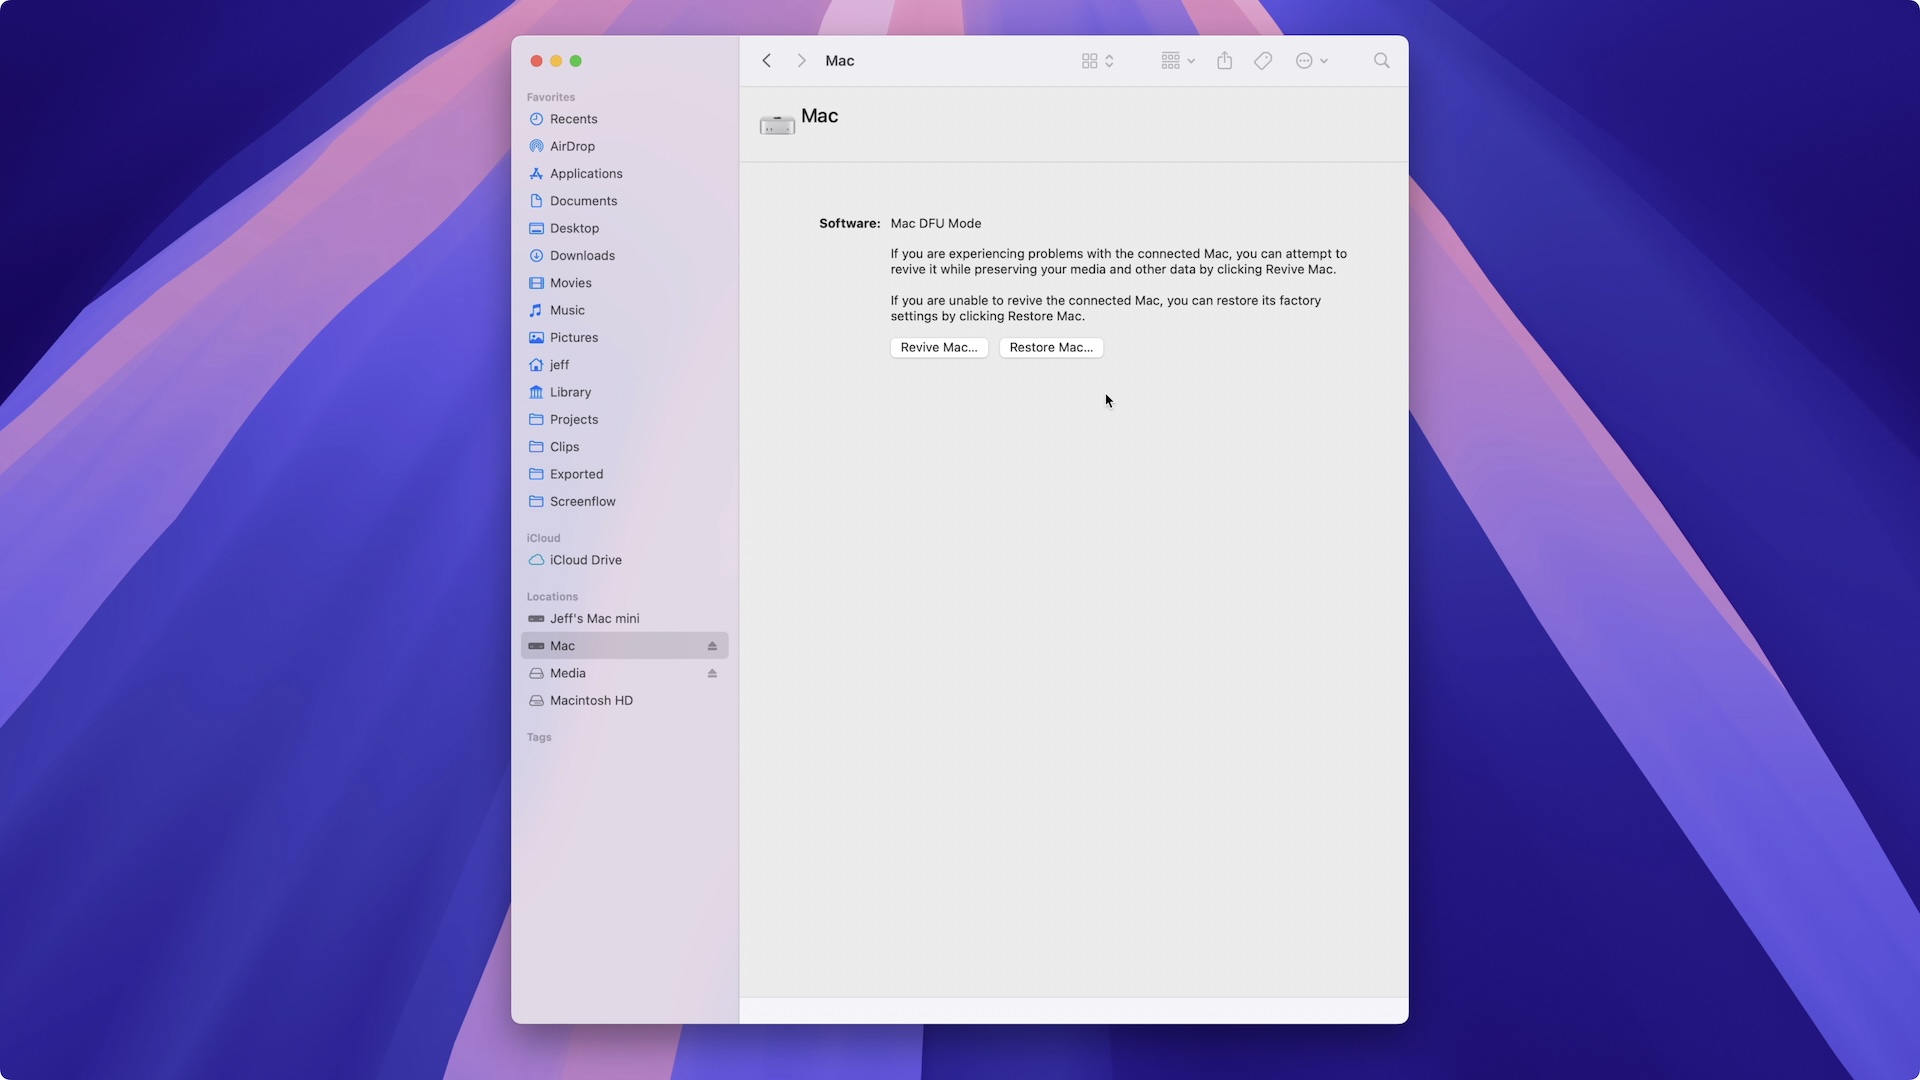
Step 5: Click on the Restore Mac button on the Mac DFU Mode Finder window.
Step 6: You’ll see a pop up warning you that your Mac shall be reset to manufacturing facility settings. Click on Restore and Replace.
Step 7: macOS will obtain the mandatory software program, after which carry out the restore. This works equally to restoring an iPhone through a Mac. Relying in your Web velocity, it may take some time to obtain the restore file. The restore course of can be considerably prolonged, so be affected person.
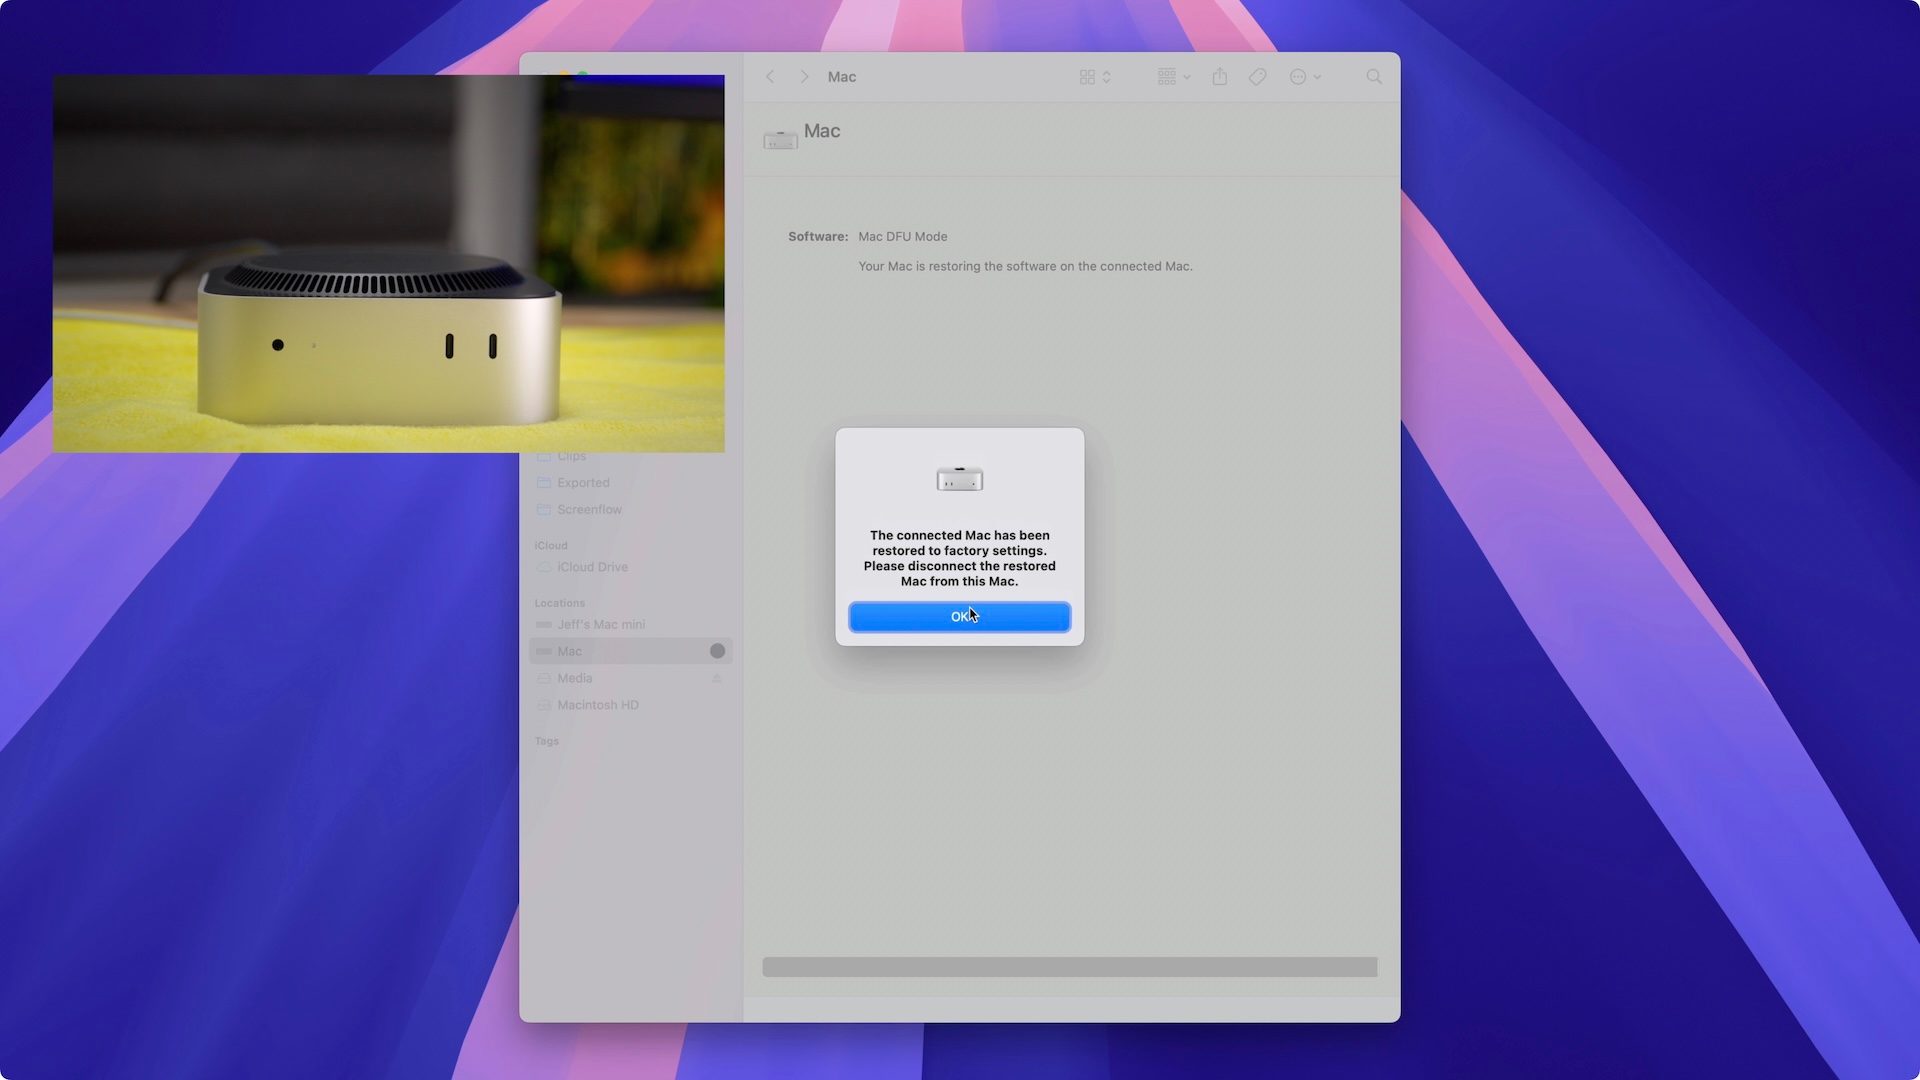
Step 8: As soon as restored, the upgraded Mac mini’s standing gentle ought to now be white, and also you’ll see a message in macOS on the machine you used to carry out the restore stating that the Mac has been restored to manufacturing facility settings. Click on OK.
Migrate the Time Machine backup information
Step 1: Disconnect your upgraded Mac mini from the opposite Mac, and join the upgraded Mac mini to a monitor, keyboard, and mouse.
Step 2: Energy on the Mac mini, and join the Time Machine backup drive to one of many USB-C ports.
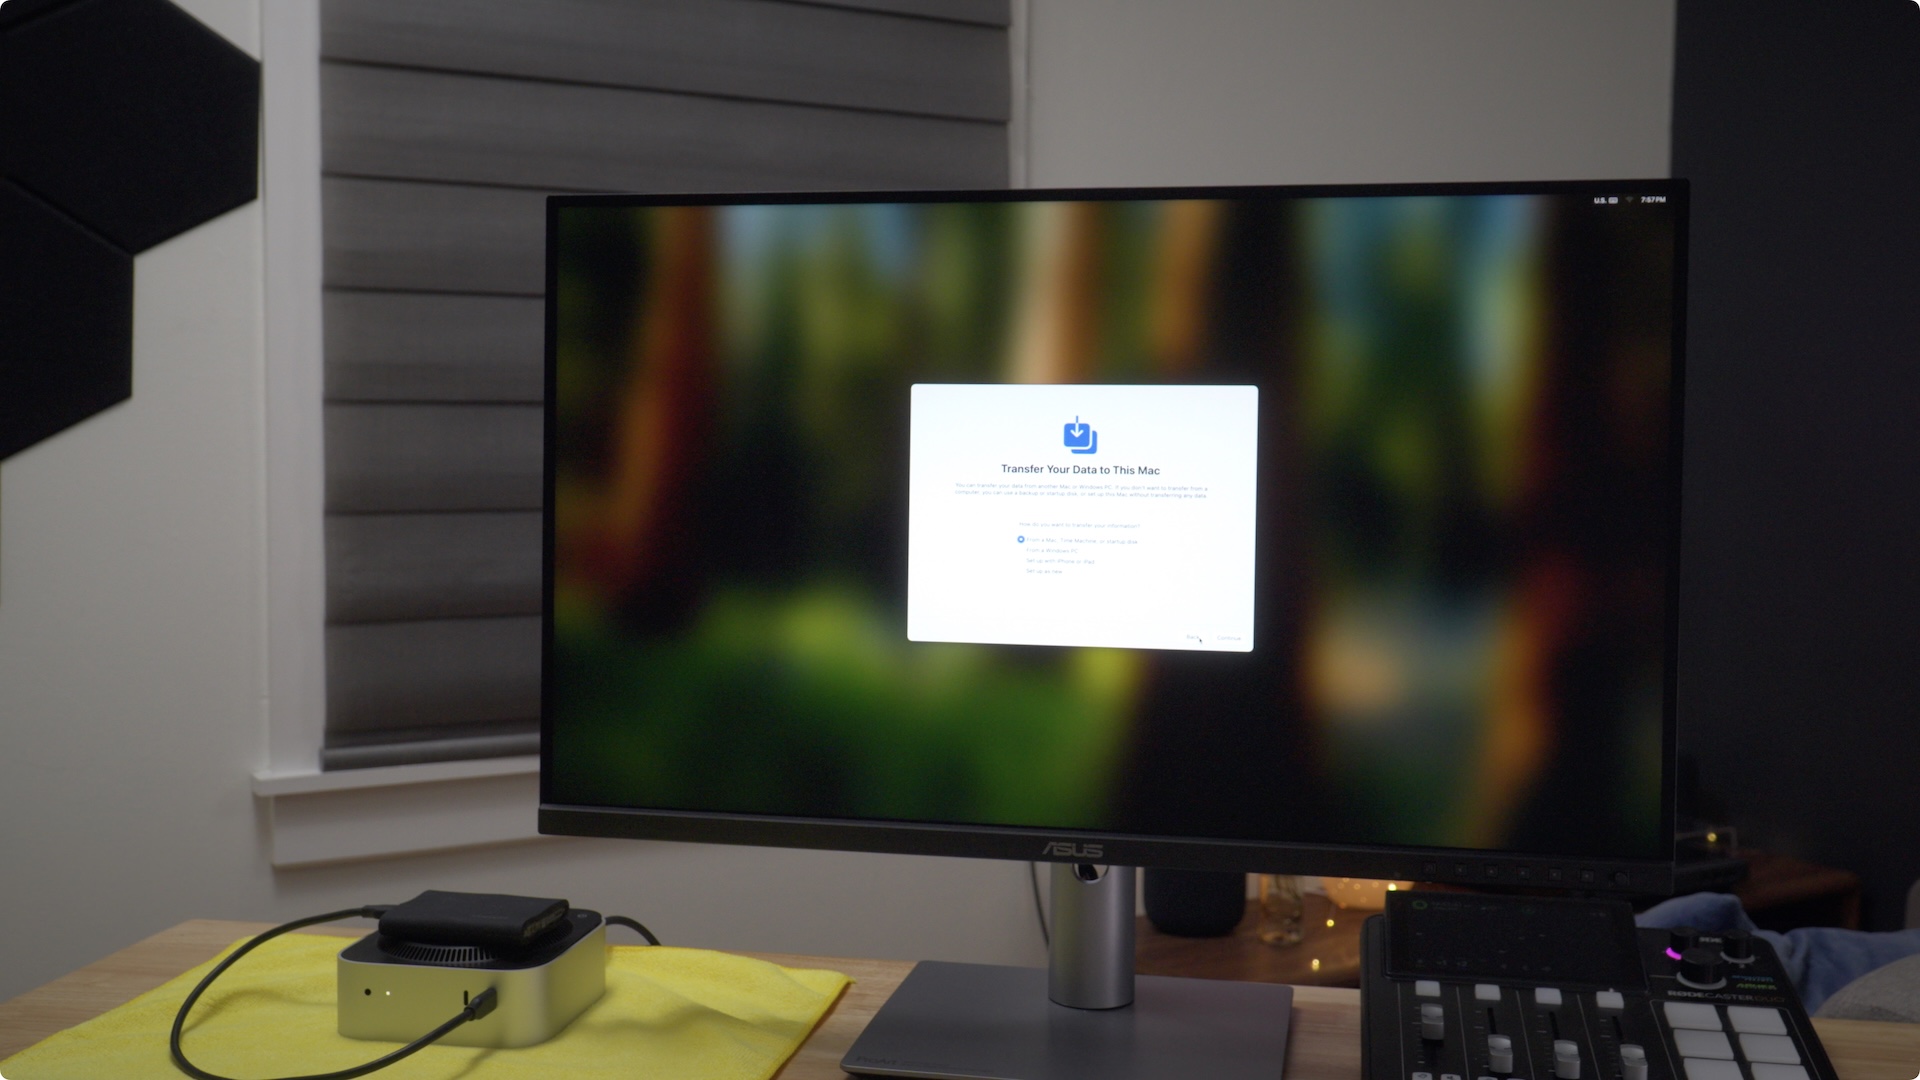
Step 3: Proceed by way of the preliminary macOS Setup course of till you attain the Switch Your Knowledge to This Mac web page. Choose From a Mac, Time Machine, or startup disk, and click on Proceed.
Step 4: Click on Not Now on the Accessibility web page, and Proceed on the Knowledge & Privateness web page.
Step 5: On the Switch info to this Mac web page, choose your exterior drive, and click on Proceed.
Step 6: When you set the Time Machine backup with encryption, enter the encryption password, and click on Unlock.
Step 7: Choose the Time Machine icon, and click on Proceed.

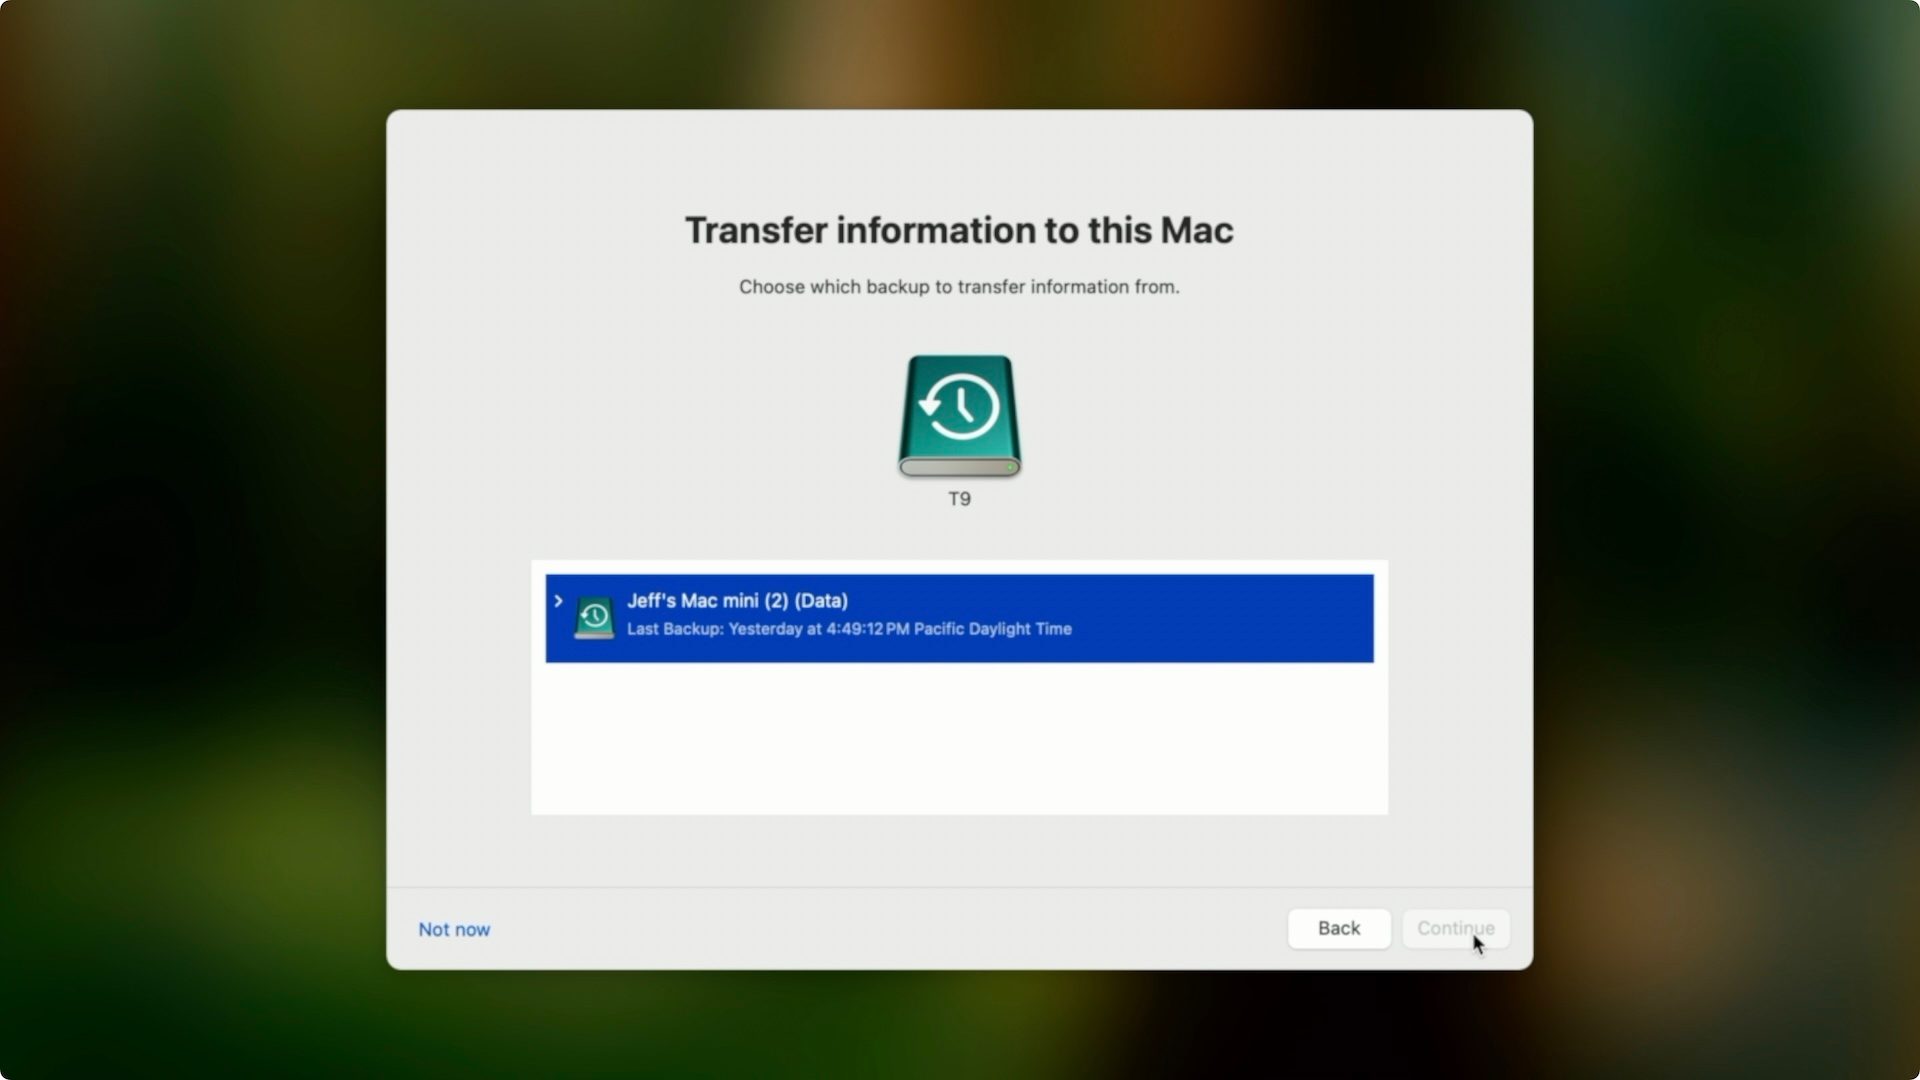
Step 8: Choose your particular Time Machine backup and click on Proceed.
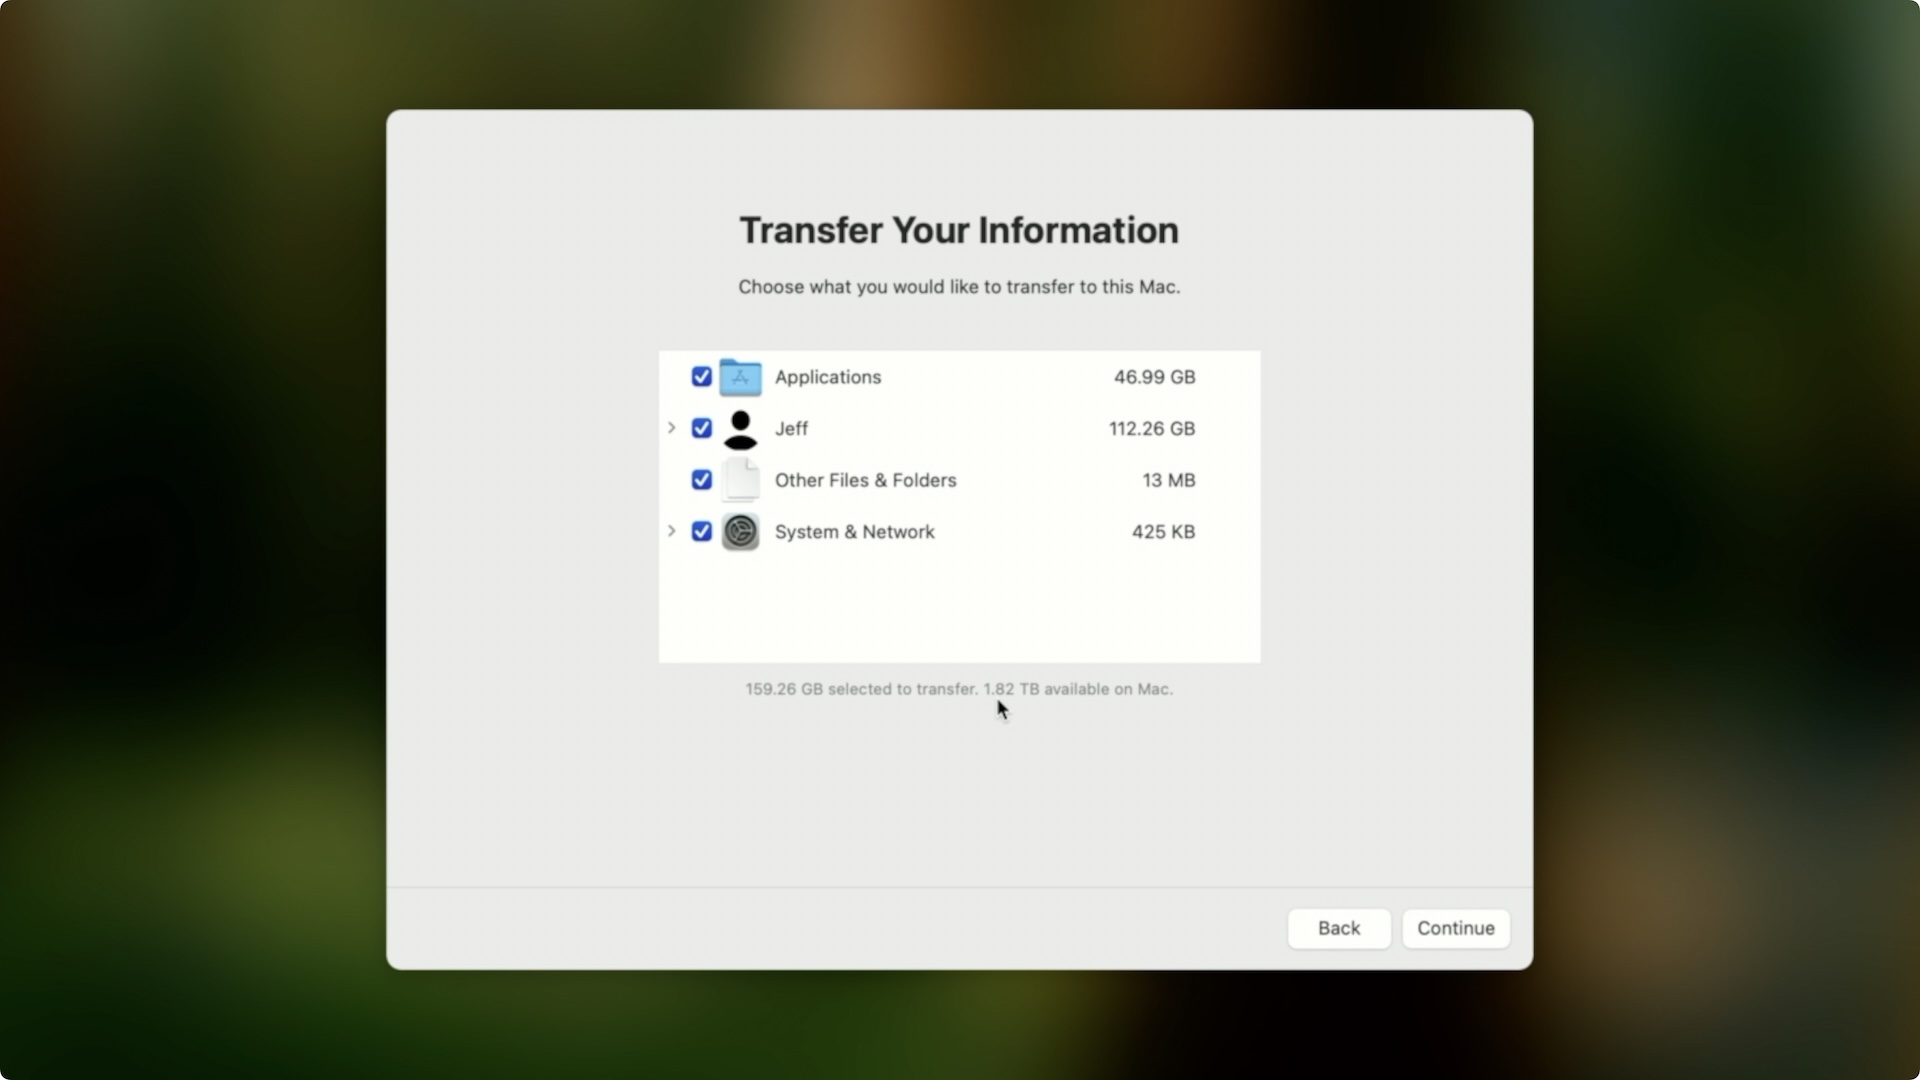
Step 9: On the Switch Your Data web page, be sure that all the things you need restored is checked and click on Proceed.
Step 10: Create a brand new password for the person related to the Time Machine backup, and click on Set Password after which click on Proceed.
macOS will now switch your info from the Time Machine backup to your upgraded Mac mini’s SSD. This may occasionally take some time relying on how massive the backup is.
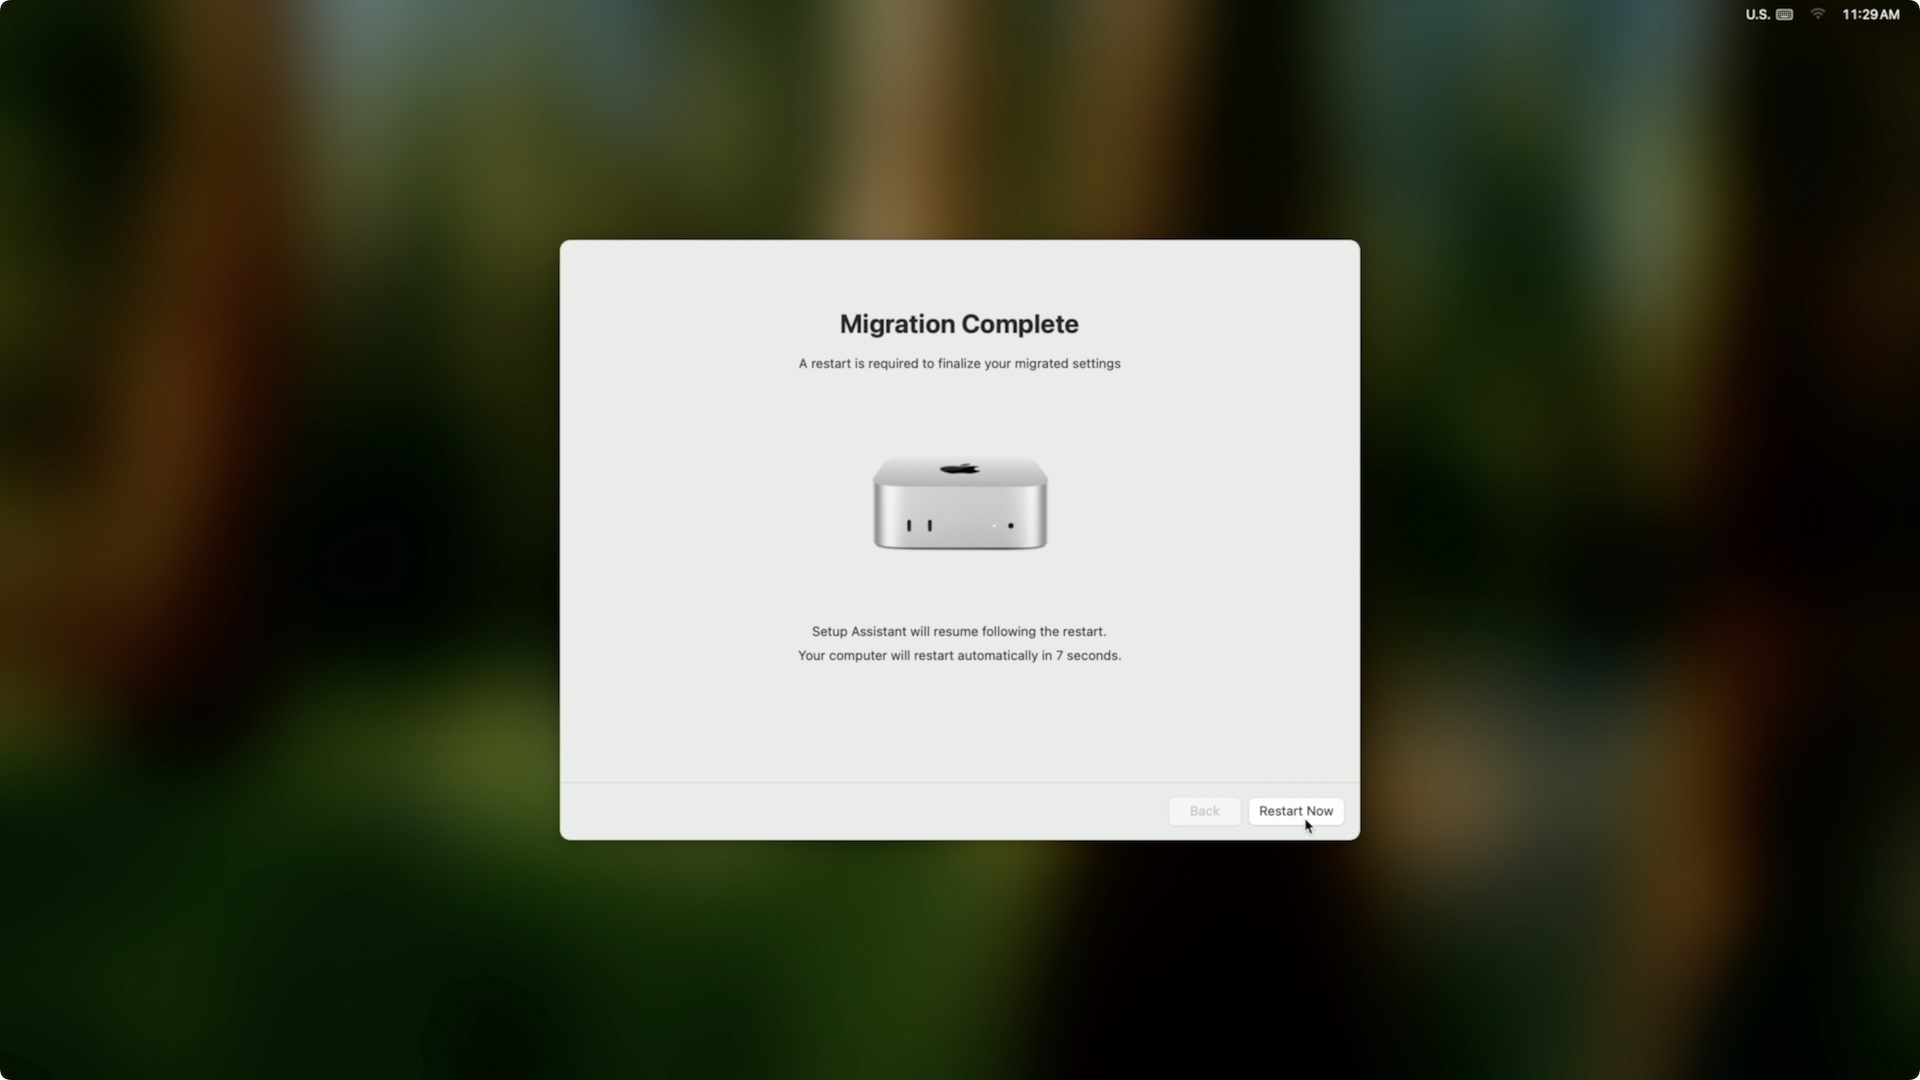
Step 11: On the Migration Full web page, click on Restart Now to complete the migration.
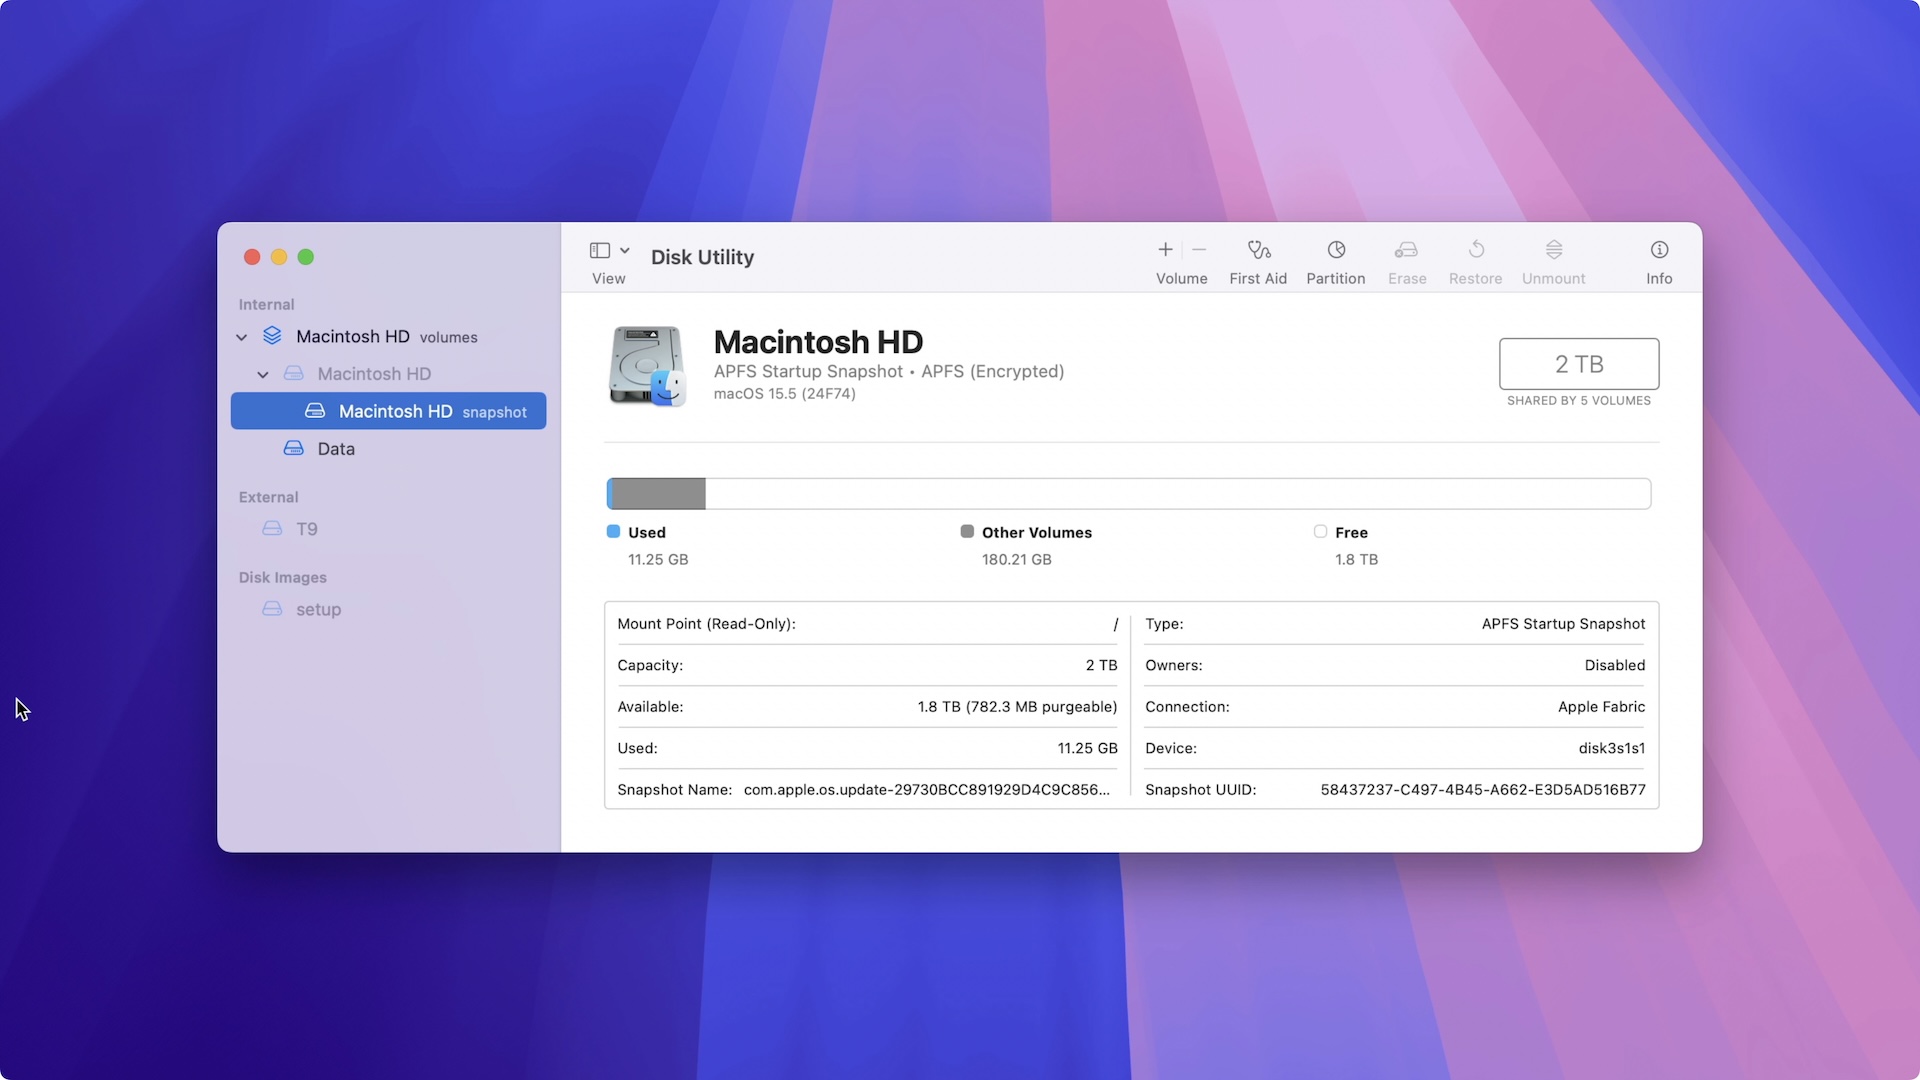
Step 12: Click on Finished when prompted, and macOS ought to show the preliminary Hey display screen to complete the rest of the preliminary setup. This contains logging again in to iCloud, organising Disk Encryption, Contact ID, and so forth. Check out your Mac to ensure all the things works, and confirm the 2TB SSD improve through Finder and/or Disk Utility.
End Mac mini reassembly
If the set up went as deliberate, you could now reassemble the Mac mini’s inside plate and again cowl. Use the eight T5 Torx screws to safe the inside plate, and align the clips on the underside cowl to the holes on the inside plate and press all the way down to lock the underside plate again into place.
Congratulations, you simply saved lots of of {dollars} on a 2TB SSD improve!
9to5Mac’s Take
The great factor about this set up is that it’s completely non-destructive and might simply be reverted. It additionally requires no cable removals, or the rest bizarre. The set up requires eradicating simply 13 screws, and could be carried out in a matter of minutes. I wished to problem myself, and I used to be capable of open the Mac mini and carry out the set up in 5 minutes. It’s the Time Machine backup, DFU restore, and migration that takes up the vast majority of the time, because the precise {hardware} set up is cake so long as you’ve got the wanted instruments.
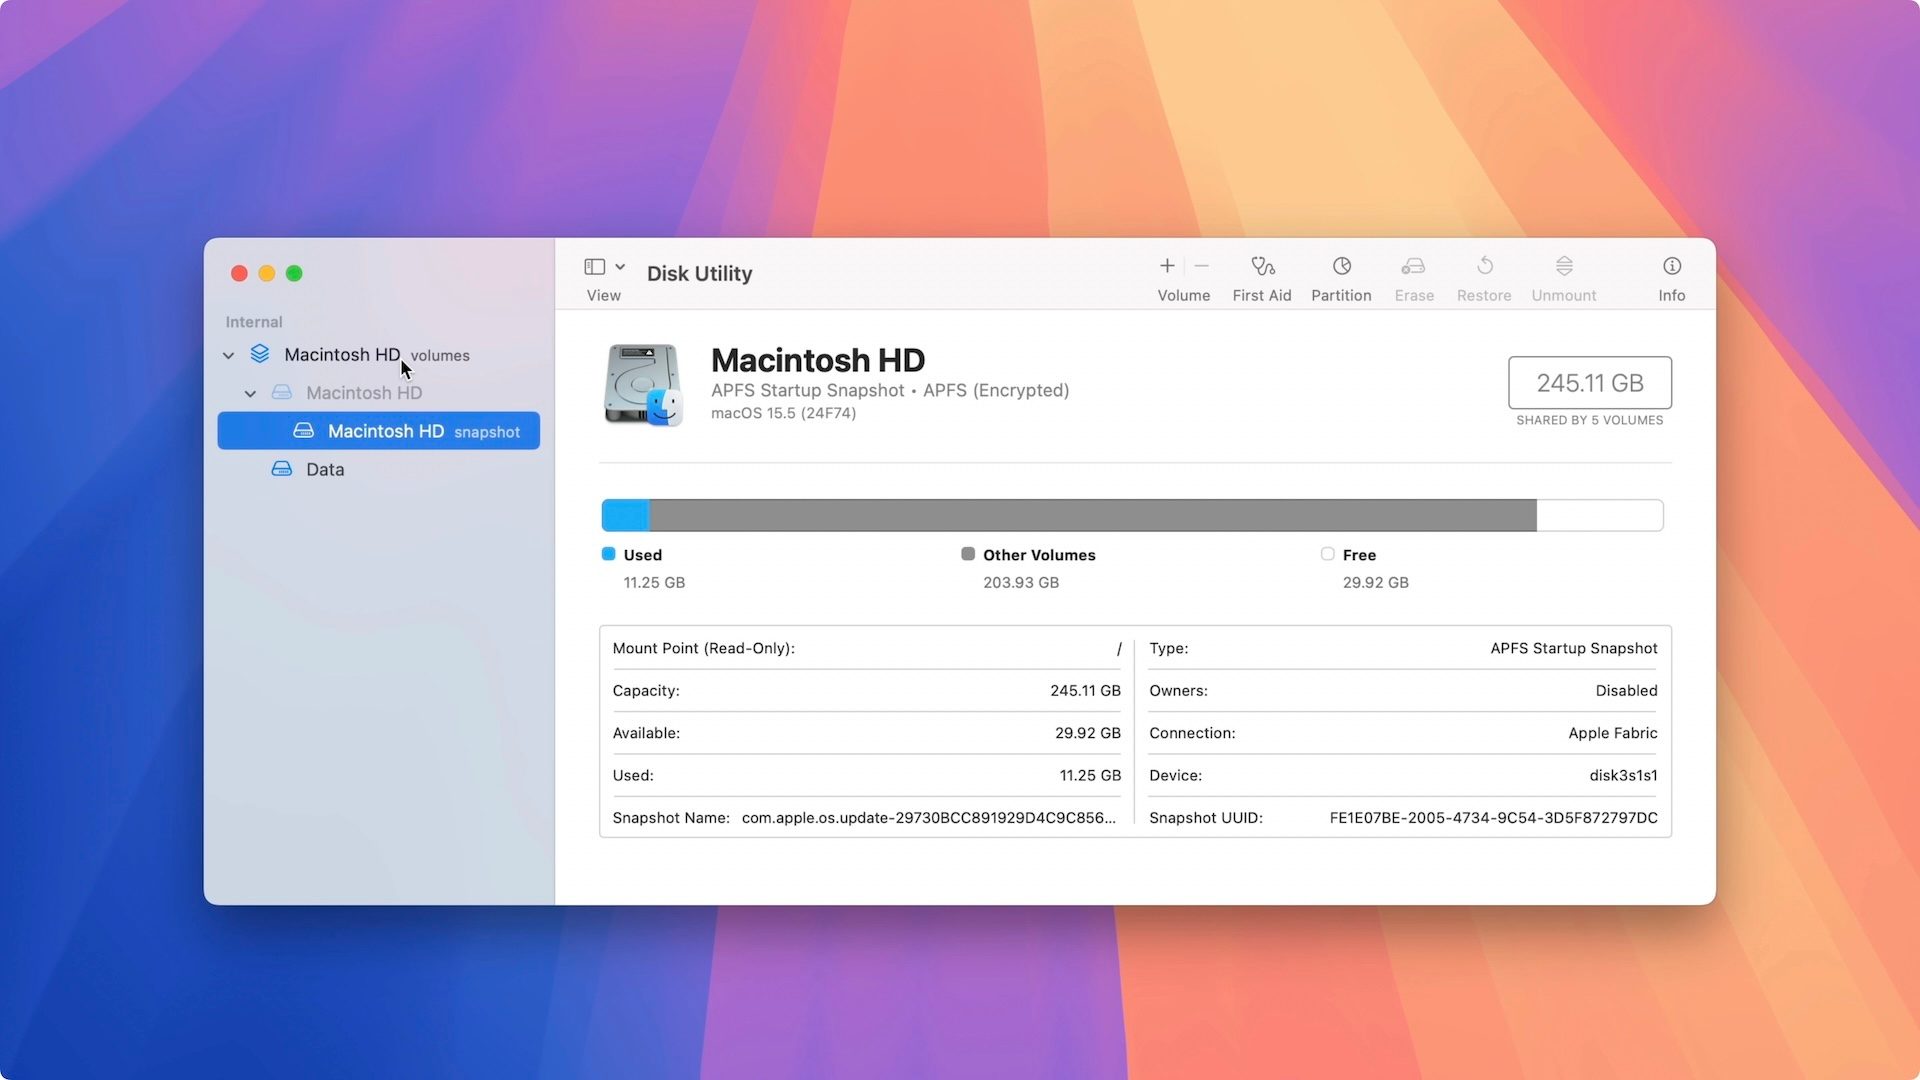
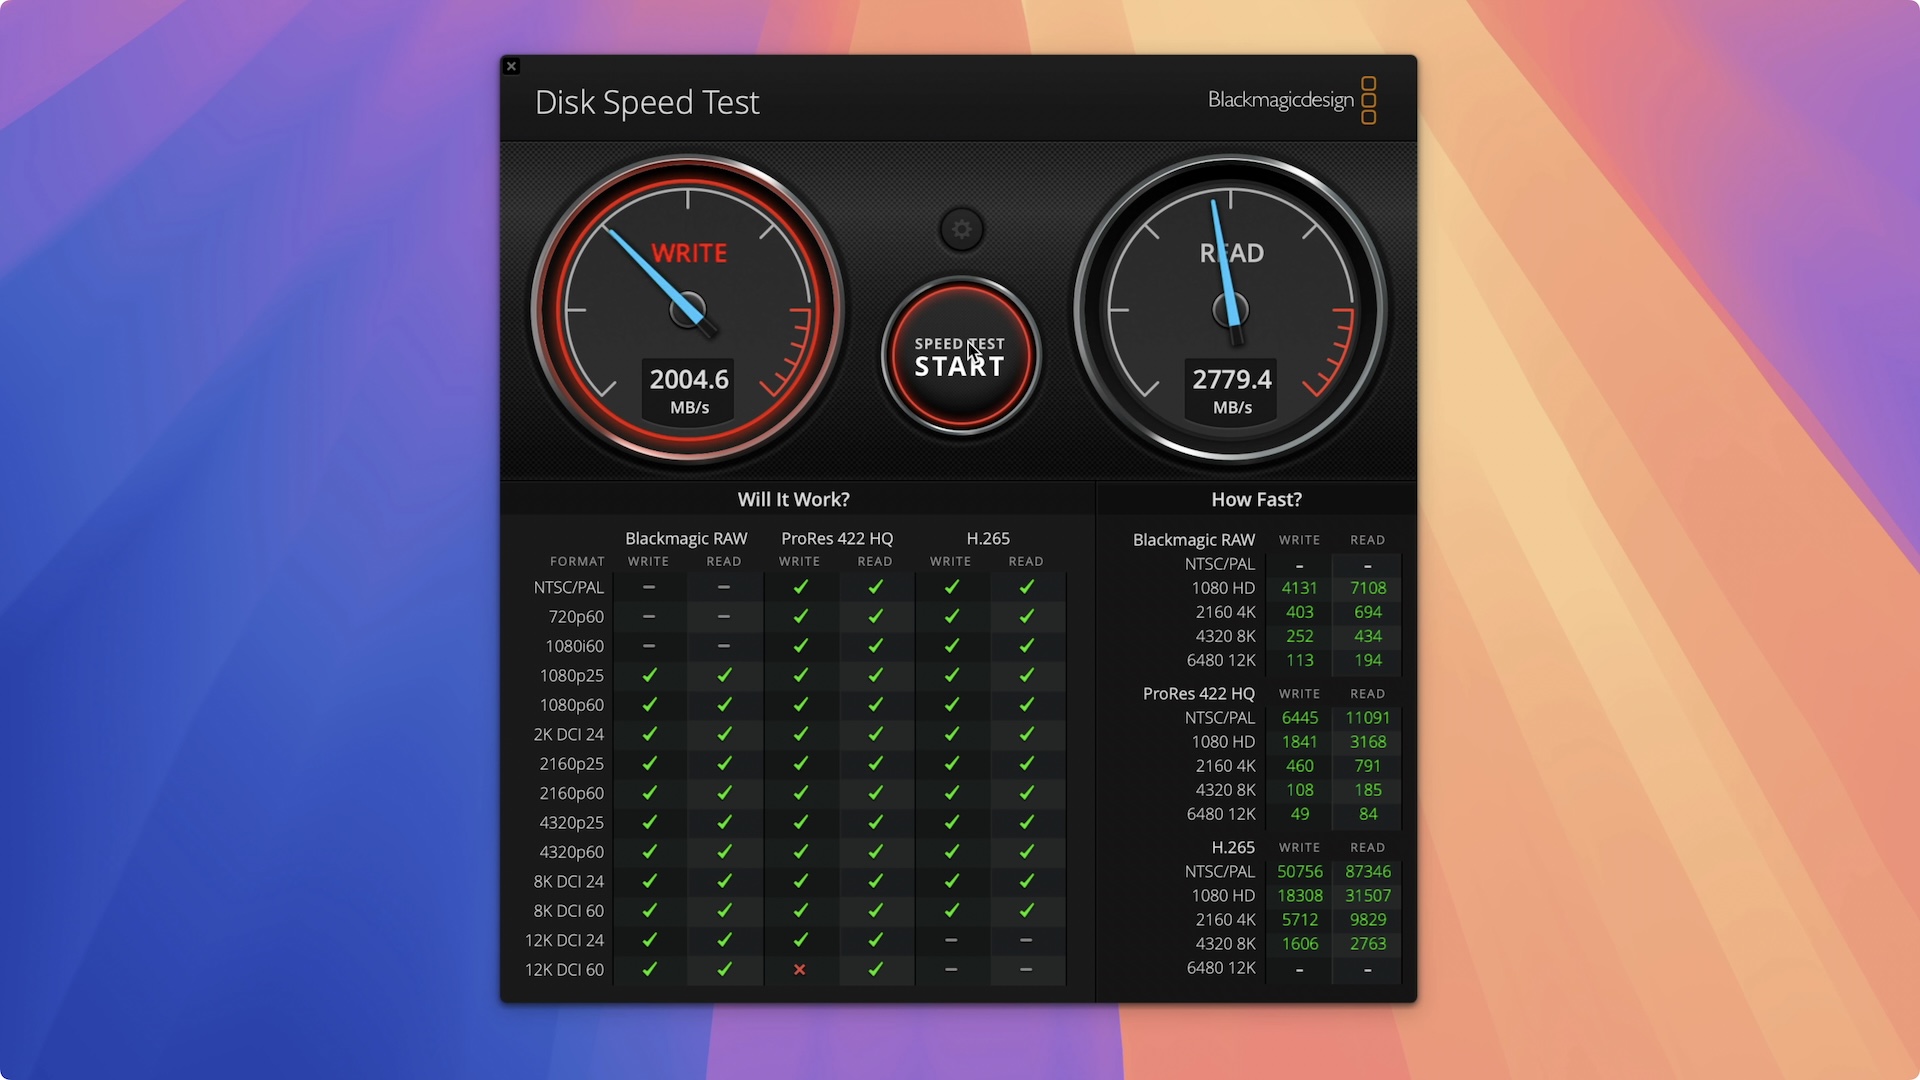
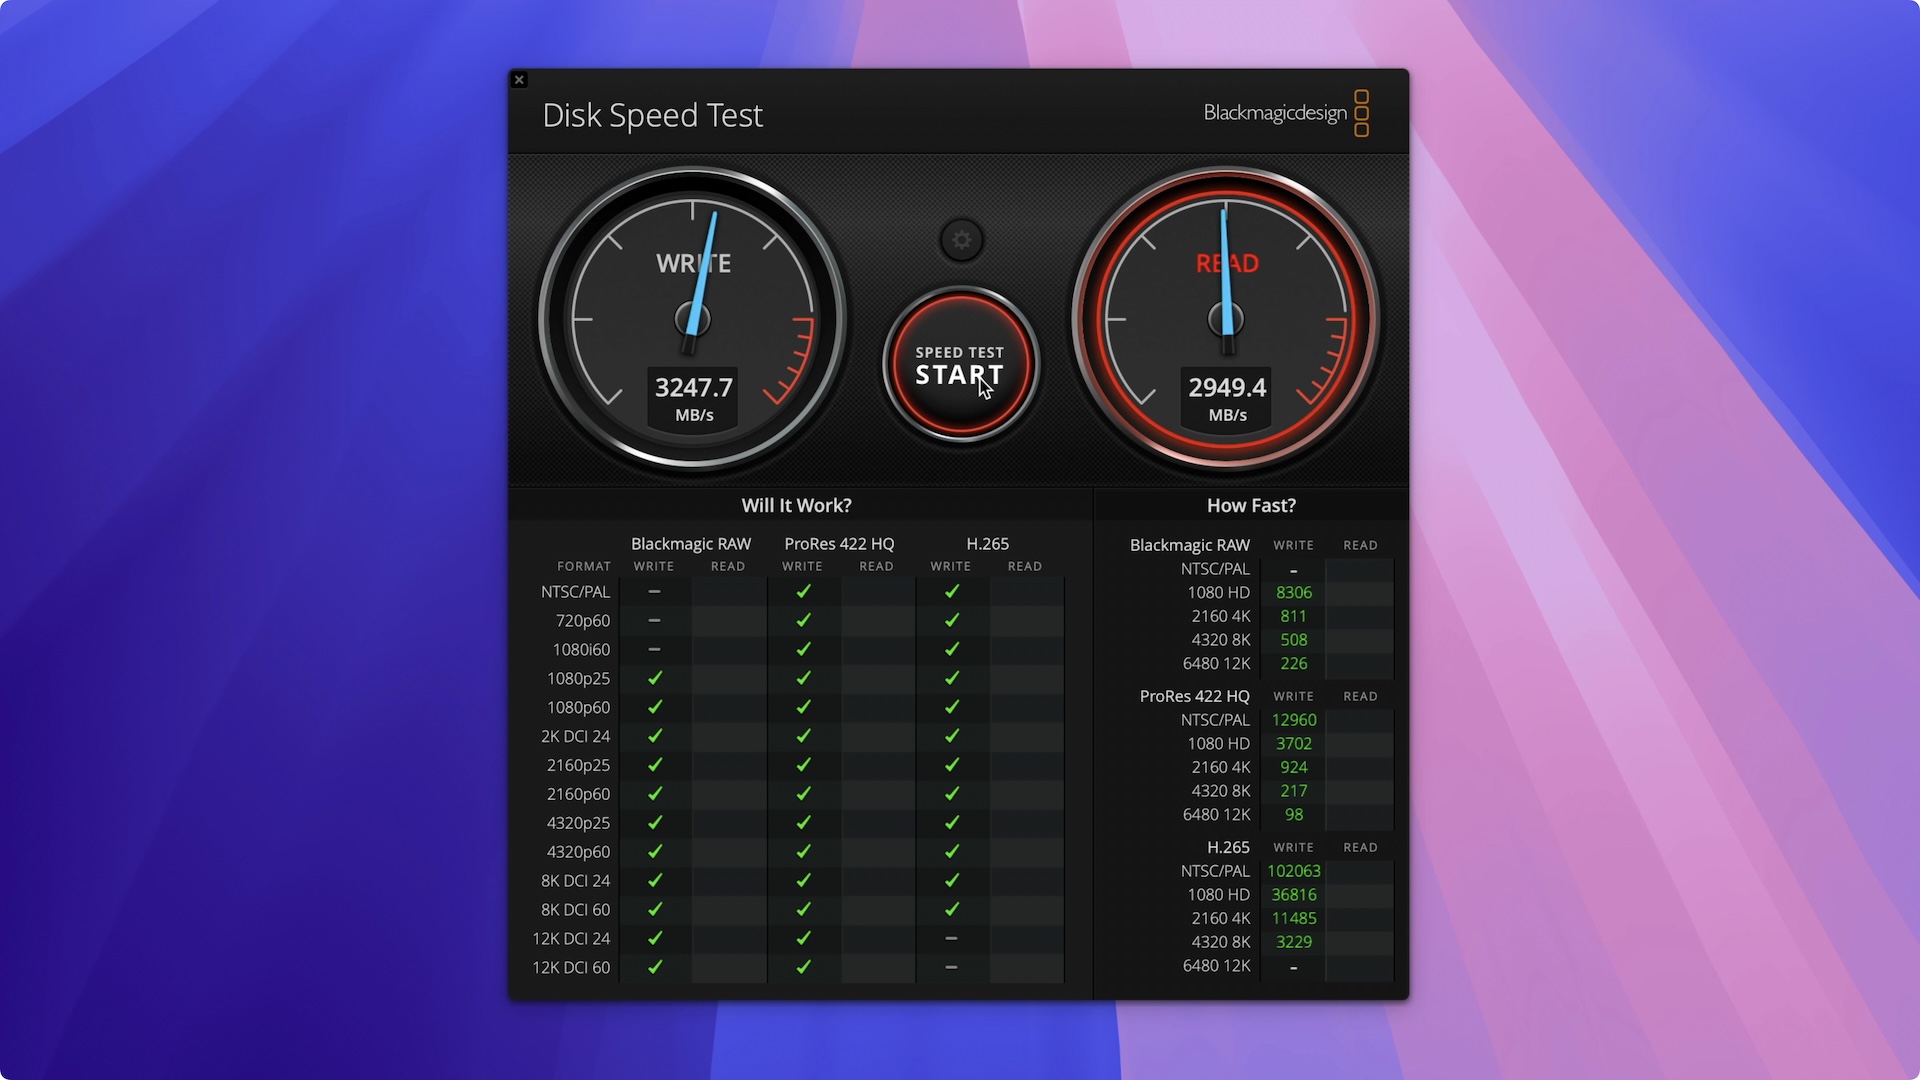
When evaluating the 2 drives, the efficiency of the upgraded 2TB SSD is predictably quicker in terms of write speeds. However I’m curious to see how the drive holds up over the long run.
Are Apple’s drives that a lot better from a reliability standpoint that it warrants a $500 value distinction, or are these drives largely the identical, with Apple making insane margins for every improve bought? Time will inform, however I’ll remember to report again with extra data as soon as I’ve been capable of put the machine by way of the wringer for a number of months.
Would you contemplate this improve to your M4 Mac mini? Why or why not? Hold forth down beneath along with your ideas.
FTC: We use earnings incomes auto affiliate hyperlinks. Extra.